
Main Courses
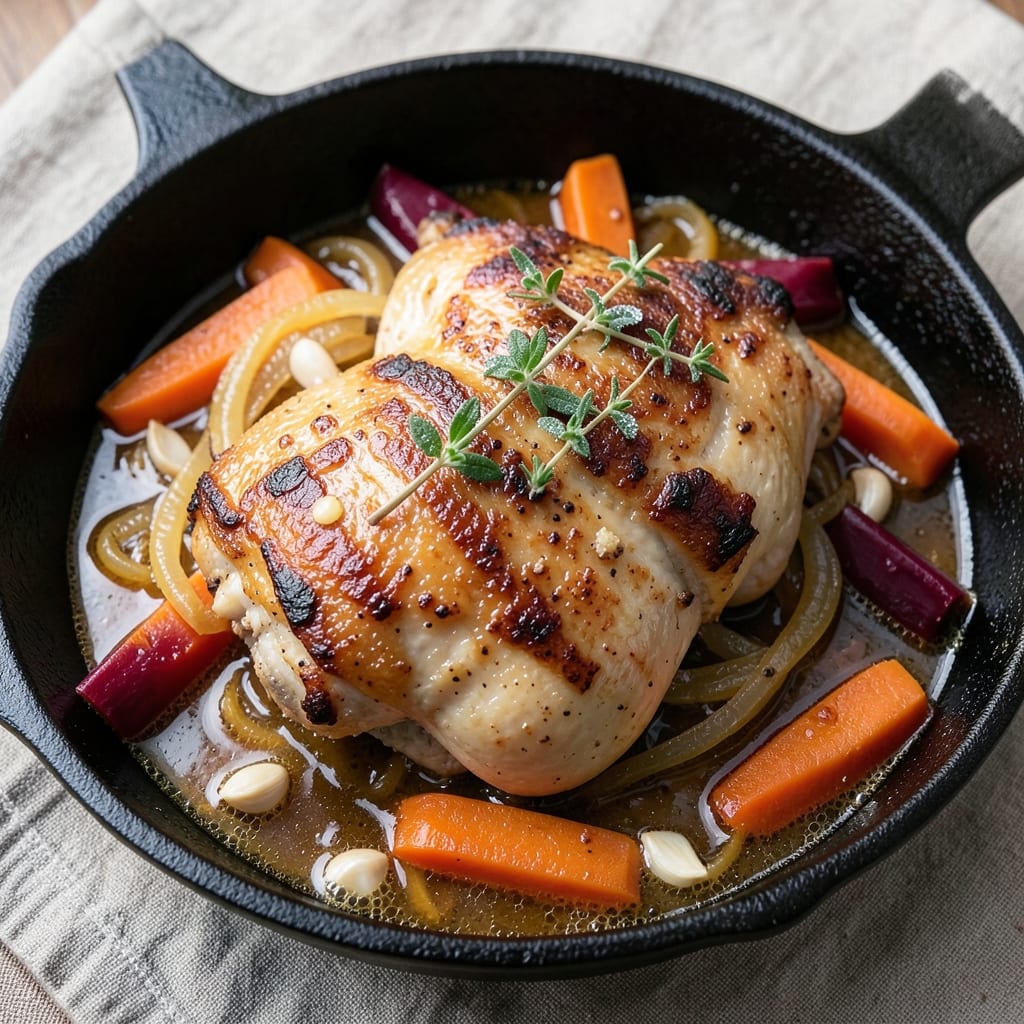
This apple cider braised chicken recipe transforms simple ingredients into a rich, deeply flavorful centerpiece that tastes like autumn in every bite. The secret lies in slow-cooking chicken until it's fork-tender while letting apple cider caramelize into a glossy fond that coats each piece. I first discovered this technique while trying to recreate my grandmother's Sunday dinner—her method for making tough cuts melt in your mouth still guides me today.
What makes this recipe special is the balance of sweet and savory: the apple cider's natural sugars caramelize beautifully, while spices like thyme and bay leaf create layers of warmth. The process is straightforward—sear the chicken, deglaze with cider, then let it braise at 325°F until the meat falls apart. No fancy equipment needed, just patience and a Dutch oven. The result? Juicy, tender chicken swimming in a sauce so rich it feels like a hug in a bowl.
By the time you're done, you'll have a dish that's restaurant-quality but made in your home kitchen—perfect for chilly evenings when you crave comfort. The fond left in the pot is pure magic, adding depth that elevates even simple sides like roasted carrots or crusty bread. This is the kind of meal that disappears faster than you can say "seconds, please." Let's get cooking.
Pro tip: Let the chicken rest for 10 minutes after braising—this ensures every bite stays juicy, not a lesson I learned the hard way after serving dry chicken once. The cider fond also freezes beautifully, so you can make a double batch for future dinners. Trust me, this recipe will become your new weeknight staple.
Ingredients for apple cider braised chicken
Simple ingredients that transform into restaurant-quality comfort food with just time and patience.
| Ingredient | Amount | Notes |
|---|---|---|
| Chicken Thighs 🍗 | 1 ½ lb | Bone-in, skin-on preferred |
| Unsalted Butter 🧈 | 4 tbsp | For searing chicken |
| Apple Cider 🍎 | 1 ½ cups | 100% pure, no additives |
| Carrots | 3 medium | Whole, peeled and sliced |
| Yellow Onion 🧅 | 1 whole | Diced, about 1 cup |
| Garlic Cloves 🧄 | 4 cloves | Minced, fresh preferred |
| Fresh Thyme 🌿 | 2 tbsp | Leaves only, chopped |
| Bay Leaves 🌿 | 2 whole | Dried or fresh |
| Salt 🧂 | 1 ½ tsp | Kosher or sea salt |
| Black Pepper 🌶️ | ½ tsp | Freshly ground |
| All-Purpose Flour 🌾 | 1 tbsp | For thickening fond |
| Chicken Broth 🥫 | 1 cup | Low-sodium preferred |
The chicken thighs are the star—bone-in, skin-on cuts stay juicy while braising. Look for good marbling at the grocery store, especially at Whole Foods or local butchers if you're feeling fancy. I always grab the organic free-range when I can, but regular store-brand works too. The apple cider should be 100% pure—avoid those pre-mixed cider cocktails with added sugar. Mott's or Woodchuck are my go-tos, but any clear, unfiltered cider will do. Fresh thyme is ideal, but if you only have dried, use half the amount. The carrots can be baby carrots if that's what's in the fridge—just trim the ends.
No apple cider? Substitute with unsweetened apple juice, though the fond won't caramelize as beautifully. Short on thyme? Rosemary at half the amount works in a pinch. The flour is just to thicken the fond at the end—if you're making a big batch, you might want to double it. The chicken broth adds depth, but vegetable broth works just as well. For extra richness, I sometimes add a splash of dry sherry with the cider. The bay leaves are non-negotiable—they're what gives that deep, aromatic base flavor that makes this dish taste like home.
This dish tastes even better the next day, so make a double batch if you're feeding a crowd. The fond freezes beautifully—just portion it into ice cube trays and store for up to 3 months. For serving, I like to strain the sauce through a fine-mesh sieve to get rid of any herb bits, but leaving them in adds texture if you prefer. The chicken keeps in the fridge for 4-5 days if stored in the braising liquid. Pro tip: Let the chicken rest for 10 minutes before serving—this ensures every bite stays juicy, not a lesson I learned the hard way.
Why You'll Love This Recipe
- One-Pot Magic: I swear by this when I’m too tired to scrub pots—just brown the thighs, dump in cider and veggies, then walk away. The onions caramelize right in the pan while the cider reduces to a sticky, golden sauce. No extra dishes, no stress.
- Sweet-Savory Obsession: That first bite? The crispy skin gives way to tender meat swimming in a sauce that’s tangy from the cider, sweet from the carrots, and deepened by the butter’s richness. It’s the kind of dish that makes you pause mid-bite to savor it.
- Leftovers That Beg Repeat: Between us, this tastes better the next day. The flavors meld into something richer, and reheating just takes two minutes. I portion it into containers on Sunday so I’m not scrambling for dinner all week—especially when my kiddo “accidentally” leaves the fridge door open.
- Budget-Friendly Feast: Chicken thighs stretch further than breasts, and a single bottle of cider (plus a few cheap carrots) turns into a meal that feeds four for under $15. Honestly, it’s my go-to when I’m trying to stretch groceries without sacrificing flavor. Plus, the leftovers freeze like a dream.
Step-by-step instructions for apple cider braised chicken
Here's how to transform simple ingredients into rich, fall-off-the-bone chicken with a fragrant apple cider sauce.
Sear the Chicken Thighs for Maximum Flavor
Pat the 1.5 lb chicken thighs completely dry with paper towels—this ensures a perfect golden crust. Heat 2 tablespoons of the unsalted butter in a large Dutch oven over medium-high heat until it foams. Working in batches if needed, add the chicken thighs skin-side down and cook undisturbed for 5-6 minutes until the skin is deep golden brown and crispy.
Flip the chicken and cook for another 3-4 minutes until the second side is golden. Transfer the chicken to a plate and set aside. The remaining 2 tablespoons butter in the pot will help build flavor—don't wipe it out. This initial sear locks in juices and creates the foundation for our rich braising liquid.
Build the Aromatic Base
In the same Dutch oven, add the diced yellow onion and cook for 4-5 minutes until softened and lightly caramelized. Add the 3 medium carrots and cook for another 3 minutes until they begin to soften. Stir in the 4 minced garlic cloves and cook for 30 seconds until fragrant—this step develops the base flavors that will infuse the chicken.
Sprinkle in the 2 tbsp fresh thyme and 2 whole bay leaves, then pour in the 1.5 cups apple cider. Scrape up any browned bits from the bottom of the pot with a wooden spoon—these contain concentrated flavor. Bring the mixture to a simmer over medium heat for 5 minutes to let the apple cider reduce slightly and meld with the aromatics.
Braise Until Fork-Tender
Return the chicken thighs to the Dutch oven, skin-side up. Add the 1 cup chicken broth, then sprinkle with 1.5 tsp salt and 0.5 tsp black pepper. Bring to a gentle simmer, then reduce heat to low, cover, and transfer to a 350°F oven. Braise for 45-50 minutes until the chicken is fork-tender and the meat pulls away easily from the bone.
Here's the thing—don't peek! Every time you lift the lid, you lose heat and steam, which can make the chicken tough. The chicken is done when it reaches an internal temperature of 165°F at the thickest part, and the sauce has thickened into a glossy fond. The carrots should be tender but still hold their shape.
Thicken the Apple Cider Fond
Once the chicken is tender, remove it from the pot and transfer to a serving platter. Increase the heat to medium-high and sprinkle the 1 tbsp all-purpose flour over the braising liquid. Stir vigorously for 1-2 minutes until the sauce thickens and becomes glossy—this creates our signature apple cider fond. If the sauce is too thick, add 1-2 tablespoons of water to reach your desired consistency.
Taste and adjust seasoning if needed. The sauce should be sweet, tangy, and rich with deep caramelized flavors. Return the chicken to the sauce, spooning some of the fond over the top. Let it rest for 5 minutes before serving to allow the juices to redistribute throughout the meat.
Serve with Crispy Skin and Rich Sauce
Serve the chicken directly from the Dutch oven, spooning the apple cider fond over the top. The skin should be crispy and golden, while the meat inside should be fork-tender with juices flowing. The sauce should coat the back of a spoon and have a beautiful glossy sheen.
This dish pairs beautifully with crusty bread to soak up the rich sauce or over mashed potatoes for a hearty meal. The balance of sweet apple cider, savory chicken, and aromatic herbs makes this a comforting dish perfect for any season. Enjoy it while warm for the ultimate experience!
Pro Tips For Making Apple Cider Braised Chicken
- Brown the Thighs First: Don’t skip the golden crust—sear those chicken thighs skin-side down in butter until deep brown, about 8-10 minutes. I used to rush this, and the dish always tasted flat. The Maillard reaction makes the difference between good and wow.
- Use Thick Cider, Not Thin: Check your apple cider’s thickness before adding it to the pot. If it’s watery, simmer it uncovered for 5 minutes first to reduce slightly. Thin cider won’t coat the chicken properly, and you’ll end up with a watery sauce instead of a rich braise.
- Salt the Cider Like Broth: Taste your apple cider before adding it to the pot—it’s often underseasoned. Add ½ teaspoon of salt per cup of cider (adjust to taste) to match the depth of flavor you’d add to broth. It’s the one step I skip when I’m tired, and the dish always feels off afterward.
- Deglaze Aggressively: After browning the chicken, don’t just splash in the cider—scrape up every last bit of fond from the bottom with a wooden spoon. That’s where the flavor lives. I learned this the hard way after making a batch that tasted bland despite following the recipe.
Flavor customization for this apple cider braised chicken
Sweet & Spicy Twist
Add 1 tbsp chili powder and ½ tsp smoked paprika to the apple cider when building the braising liquid. This creates a perfect balance of sweetness from the cider and warmth from the spices. For extra heat, stir in ½ tsp cayenne pepper at the end—just enough to make the sauce sing. I first tried this after a trip to New Mexico, where I saw how chiles and apples pair beautifully. 🌶️
Herb-Infused Variations
Swap out thyme for rosemary or sage—both work wonderfully with apple cider. For a fresh twist, add 2 sprigs of fresh rosemary during the braising stage. If you love bright flavors, try 1 tsp dried tarragon with the bay leaves. My grandmother always swore by rosemary with apple dishes, and I’ve never looked back. The herbs release their oils slowly during braising, creating layers of flavor.
Citrus Brightness
Zest of 1 orange or lemon added to the apple cider while simmering brightens the dish beautifully. The citrus cuts through the richness of the chicken and adds a refreshing contrast. I like to add it with the thyme and bay leaves, letting it infuse for the last 10 minutes of braising. The result? A sauce that’s tangy, sweet, and full of life—perfect for spring or summer when you want something lighter but still comforting.
Creamy Fond Finish
For a restaurant-worthy twist, stir in ¼ cup heavy cream at the end when thickening the sauce. The cream adds a velvety texture that balances the tangy apple cider perfectly. I discovered this trick after making a double batch and having leftovers—I wanted to elevate the sauce for a dinner party. Just be sure to add the cream off the heat to avoid curdling. The result is a sauce so rich, it feels like a hug in a bowl. 💛
Smoky Depth
Add ½ cup beer (like a malty brown ale) to the braising liquid for a smoky depth. The beer enhances the caramelization of the apple cider while adding a subtle bitterness that rounds out the dish. I’ve used Guinness or Samuel Smith’s Nut Brown Ale—both work beautifully. Let the beer simmer for 5 minutes before adding the chicken to allow the flavors to meld. This variation is a game-changer for beer lovers.
Vegetable Boost
Add 1 cup sliced mushrooms or ½ cup diced celery to the braising liquid for extra texture and flavor. Mushrooms soak up the apple cider beautifully, while celery adds a fresh, crisp element. I like to add them with the carrots and onions, letting them soften during the braising process. The mushrooms, in particular, develop a deep, earthy flavor that pairs perfectly with the sweetness of the cider.
Nutrition facts
Frequently asked questions
Why does the chicken need to rest after braising?
Resting the chicken for 10 minutes after braising lets the juices redistribute throughout the meat, ensuring every bite stays moist and flavorful. When you cut into chicken immediately, those juices rush out, leaving you with dry meat. This is especially important for braised dishes where the meat becomes fork-tender.
Can I use chicken breasts instead of thighs?
While you can use chicken breasts, thighs are ideal for braising because they stay juicier and more tender during the long cooking process. If you must use breasts, cut them into smaller pieces and reduce the braising time to 25-30 minutes to prevent drying out. The skin-on thighs create extra crispiness that breasts can't match.
What's the best way to reheat leftovers?
Reheat gently in a skillet over low heat with a splash of apple cider or broth to keep the sauce from drying out. Never microwave directly—it turns the chicken rubbery. For best results, warm in the oven at 300°F for 15-20 minutes until heated through. The sauce will thicken again beautifully.
Can I make this recipe in a slow cooker?
Brown the chicken first, then transfer everything to a slow cooker and cook on low for 6-7 hours or high for 3-4 hours. The slow cooker method is perfect for hands-off cooking. Just thicken the sauce at the end with a cornstarch slurry (1 tbsp cornstarch + 1 tbsp water) instead of flour.
How do I know when the chicken is done?
The chicken is done when it reaches an internal temperature of 165°F at the thickest part and the meat pulls away easily from the bone. The sauce should also be reduced and glossy. If you're unsure, cut into a piece—if it's fork-tender and juices run clear, it's perfect. Never rely on time alone!