
Desserts
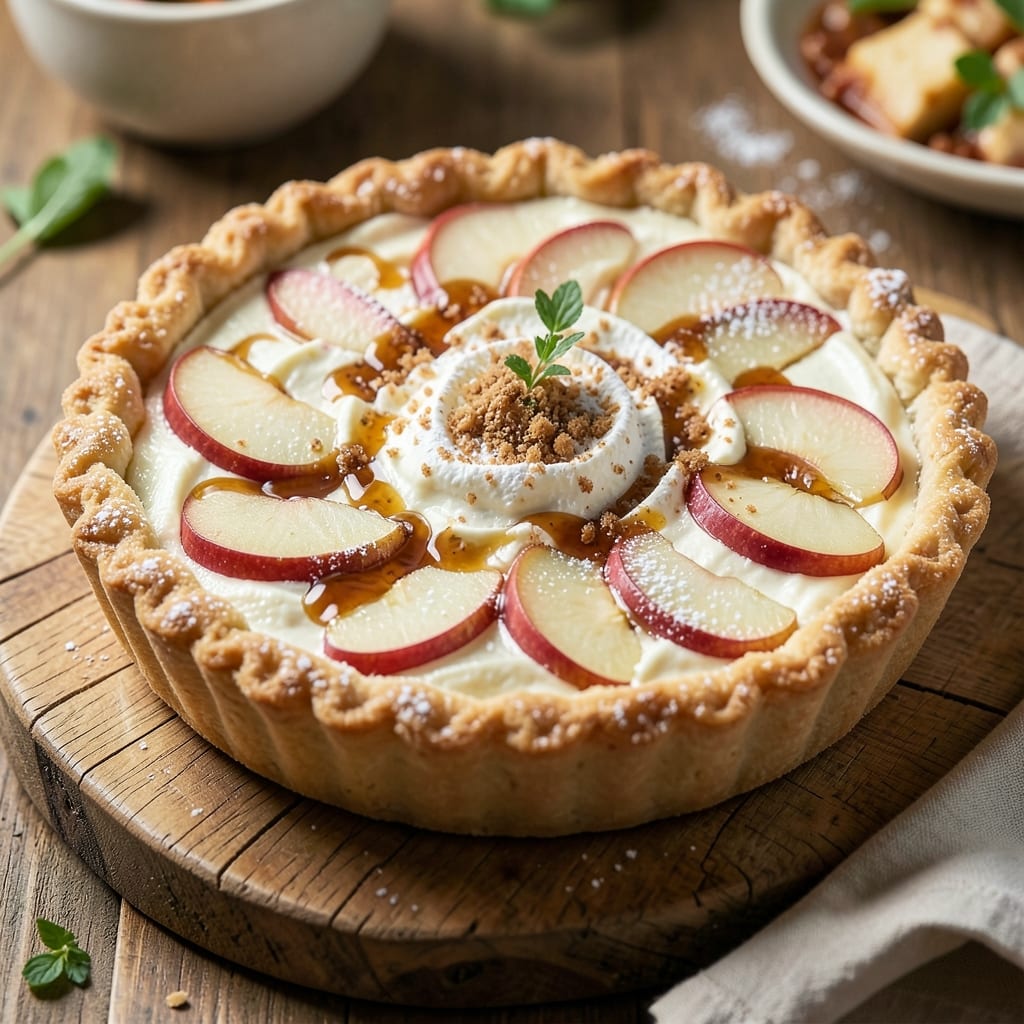
This apple cheesecake tart recipe delivers a perfect balance of buttery crust, spiced apple filling, and creamy cheesecake—each layer designed to complement the next. The key lies in blind-baking the tart shell until golden and crisp, creating the ideal foundation for the rich apple compote and velvety cheesecake topping. I've refined this recipe over years to ensure the filling stays tender while the cheesecake layer sets smoothly without cracking.
The process begins with a simple yet sturdy crust made from flour, butter, and sugar, pressed into a tart pan and baked to perfection. The spiced apple filling transforms ordinary apples into a fragrant, caramelized layer that pairs beautifully with the tangy cheesecake. What sets this recipe apart is the careful balance of ingredients—just enough cream cheese for richness, but with a touch of sour cream to keep the texture light and airy.
By the time these tarts emerge from the oven, you'll have a dessert that's both impressive and approachable—golden, flaky crusts topped with a glossy apple layer and a smooth, creamy cheesecake that melts in your mouth. The contrast between the warm spices in the apple and the cool sweetness of the cheesecake creates a flavor experience that's hard to resist.
Perfect for holidays, potlucks, or a special dessert night, these tarts are easy to customize with different apple varieties or additional spices. Let's get started on creating this crowd-pleasing dessert that combines the best of two classic flavors into one unforgettable treat.
Ingredients for apple cheesecake tart
Six layers of flavor—crisp crust, spiced apples, and silky cheesecake—all in one golden tart.
| Ingredient | Amount | Notes |
|---|---|---|
| All-Purpose Flour 🌾 | 1 ½ cups | Sifted for light texture |
| Unsalted Butter 🧈 | 1 cup | Cold, cubed for pastry |
| Granulated Sugar 🍚 | ¼ cup | Plus 1 tbsp for sprinkling |
| Large Eggs 🥚 | 1 whole | Room temperature preferred |
| Granny Smith Apples 🍎 | 4 medium | Peeled, cored, diced small |
| Light Brown Sugar 🍚 | ¼ cup | Packed for caramelization |
| Ground Cinnamon 🌿 | 1 ½ tsp | Plus extra for dusting |
| Ground Nutmeg 🌿 | ¼ tsp | Freshly grated preferred |
| Salt 🧂 | ½ tsp | Fine sea salt preferred |
| Cream Cheese 🧀 | 8 oz | Full-fat, room temperature |
| Sour Cream 🥛 | ½ cup | Full-fat for richness |
| Powdered Sugar 🍚 | ¼ cup | For dusting finished tarts |
| Vanilla Extract 🥄 | 1 tsp | Pure vanilla preferred |
| Lemon Juice 🍋 | 1 tbsp | Freshly squeezed |
The crust is where it all begins. European-style butter from Land O'Lakes or Plugrá gives that melt-in-your-mouth richness, but any good unsalted butter works. Flour? King Arthur or Bob's Red Mill for that perfect pastry texture. The secret here is chilling the dough for at least 30 minutes—don't skip it. For the apples, Granny Smiths, but Honeycrisp or Fuji work too. Just make sure they're uniformly diced—about 1/4-inch pieces so they caramelize evenly without turning to mush.
No cream cheese? Substitute ricotta mixed with lemon juice—it's lighter but still creamy. Running short on sour cream? Greek yogurt at half the amount keeps things tangy. The spices are non-negotiable though—fresh nutmeg makes all the difference. No fresh? Ground works at double the amount. For the crust, pre-shredded cheese gets clumpy, so grate your own if you're adding any. And if you're making these ahead, blind-bake the crusts first—they'll thank you later.
These tarts keep beautifully—3 days in the fridge, covered. For make-ahead magic, assemble the crusts and fillings, then freeze them unbaked. Bake straight from frozen, adding 10 extra minutes to the baking time. The cheesecake layer? Best served at room temperature, so let them sit for 20 minutes before slicing. And trust me on this—powdered sugar on top isn't just for looks. It adds that professional finish that makes everyone think you slaved over these.
Why You'll Love This Recipe
- Here’s what sold me: this tart stays perfect for days. Slice it up for school lunches, reheat a piece in the microwave for a 2-minute breakfast, or freeze portions for when you’re too tired to bake. And because it’s apples and eggs, not some fancy cream, it’s cheap enough to make twice without blinking.
- No-Fuss Assembly: I swear, this tart comes together faster than a grocery run. Just mix the butter, sugar, and eggs—no food processor, no waiting for dough to chill. The crust forms in minutes, and those Granny Smiths slice so neatly, you’ll wonder why you ever made pie crust from scratch.
- Tart-Sweet Magic: That crispy, buttery crust? It’s the perfect stage for the apples—slightly tangy, perfectly caramelized, sitting on a cloud of creamy cheesecake filling. Honestly, it’s the kind of dessert that makes you pause mid-bite and think, “Wait, how did this get so good?”
- Weeknight Hero: Between us, this is my go-to when I need something impressive but low-stress. Serve it warm or cold—brunch with coffee, a picnic with friends, or even as a “healthy-ish” dessert for the kids (they’ll never know it’s basically cake). The apples keep it feeling fresh, not heavy.
Step-by-step instructions for apple cheesecake tarts
Here's how to create these decadent tarts with a buttery crust and spiced apple filling.
👨🍳 Step 1: Prepare the Buttery Crust
In a large bowl, combine the 1.5 cups all-purpose flour and 0.5 tsp salt. Cut in the 0.75 cup cold cubed unsalted butter using a pastry cutter or your fingers until the mixture resembles coarse crumbs with pea-sized butter pieces. Sprinkle in the 0.25 cup granulated sugar and mix gently until just combined.
Press this mixture evenly into a 9-inch tart pan with a removable bottom, creating a smooth, even layer. Chill in the refrigerator for 30 minutes while you prepare the filling. This chilling step prevents the crust from shrinking during baking and ensures it stays crisp. I like to use my fingers to press it down firmly, making sure every corner is covered.
🍳 Step 2: Make the Spiced Apple Filling
Peel, core, and slice the 4 medium Granny Smith apples into thin, even rounds. In a large bowl, combine the sliced apples with 0.5 cup granulated sugar, 1 tsp ground cinnamon, 0.25 tsp ground nutmeg, and 1 tsp vanilla extract. Toss gently to coat the apples evenly with the spiced sugar mixture.
Let the apples sit for 10 minutes while you prepare the cheesecake layer. This allows the flavors to meld slightly and the apples to release some of their juices. The tartness of the Granny Smiths will balance beautifully with the sweetness of the cheesecake layer, creating that perfect harmony of flavors.
🥘 Step 3: Create the Creamy Cheesecake Layer
In a separate large bowl, beat the 16 oz cream cheese and 0.5 cup sour cream together with an electric mixer until smooth and creamy. Add the 2 large eggs one at a time, mixing just until each is incorporated. Mix in the 1 tsp vanilla extract and 0.5 tsp salt until fully combined. This mixture should be thick but still pourable.
I like to use a hand mixer for this step—it's gentle enough to avoid overmixing the eggs while still creating a smooth, lump-free batter. The cream cheese should be at room temperature for best results, so if it's cold, let it sit at room temperature for about 30 minutes before starting this step.
🔥 Step 4: Assemble and Bake the Tarts
Preheat your oven to 350°F. Remove the chilled crust from the refrigerator and arrange the apple slices in a circular pattern on top, slightly overlapping them. Pour the cheesecake mixture evenly over the apples, spreading it out to cover completely. The apples should be completely submerged in the cheesecake layer.
Bake for 40-45 minutes until the edges are golden brown and the center is just set (it should still have a slight wobble). If the top browns too quickly, tent the tart with aluminum foil. The cheesecake layer should be puffed and slightly jiggly in the center when done—it will firm up as it cools.
⏰ Step 5: Cool and Serve with Powdered Sugar
Remove the tart from the oven and let it cool completely at room temperature. Once cooled, dust the top generously with the 2 tbsp powdered sugar using a fine-mesh sieve. This step adds that beautiful, snowy finish that makes these tarts look so impressive.
Slice into 6 equal wedges and serve at room temperature. The contrast between the crisp buttery crust, the spiced apple filling, and the creamy cheesecake layer is what makes these tarts so special. For an extra touch, you can garnish each slice with a few extra apple slices or a sprinkle of cinnamon before serving.
Pro Tips For Making Apple Cheesecake Tart
- Chill the Apple Filling: Granny Smiths release liquid when sliced, and that turns your tart into a soggy mess. Toss the diced apples with sugar and lemon juice, then let them sit in the fridge for 15 minutes before baking. This draws out the excess moisture—trust me, your crust will stay crisp.
- Prevent Overmixing the Dough: The moment you see streaks of butter in the flour, stop. Overworking the crust makes it tough instead of flaky, and that’s the last thing you want under a creamy cheesecake layer. Cut in the butter until it’s pea-sized, then add just enough ice water to hold it together.
- Use Room-Temp Eggs: Cold eggs won’t blend smoothly, and you’ll end up with lumps in your cheesecake filling. Take them out of the fridge 30 minutes before mixing—yes, even if you’re in a hurry. The filling will be silky, not grainy, and that makes all the difference when sliced.
- Bake in a Water Bath: This isn’t just for cheesecakes—your tart’s filling will stay dense and rich if you bake it in a water bath. Wrap the pan in foil (leave the top open) and place it in a roasting pan with 1 inch of hot water. The steam keeps the center from cracking, and the texture stays perfect.
Essential equipment for apple cheesecake tart
Crust Perfection Tools
Start with a 9-inch tart pan with removable bottom—I recommend Nordic Ware for its sturdy construction. For the crust, use a pastry cutter or your fingers to cut cold butter into flour until pea-sized pieces remain. A rolling pin with a 1/8-inch thickness guide ensures even crusts. Chill your dough for at least 30 minutes to prevent shrinking during baking. 🧈
Apple Prep Essentials
Use a sharp chef's knife or mandoline for even apple slices—Granny Smiths hold their shape best. A fine-mesh sieve helps drain excess juice after tossing with spices. For caramelization, a nonstick skillet (like All-Clad) works well if you prefer pre-cooking the apples. Keep your spices in airtight containers to maintain freshness. 🍎
Cheesecake Mixing Must-Haves
A stand mixer with the paddle attachment creates the smoothest cheesecake batter, but a hand mixer works fine too. Use a rubber spatula to scrape down the sides for even mixing. For precise measurements, a kitchen scale ensures the perfect 8 oz cream cheese to 1 cup sour cream ratio. Room-temperature cream cheese blends more smoothly—plan ahead! 🥛
Baking with Precision
An oven thermometer (like Thermoworks) ensures accurate 350°F heat—ovens vary! A pie bird helps prevent over-browning if your tart browns too quickly. For testing doneness, use a long skewer—it should come out with moist crumbs, not wet filling. Let tarts cool completely before slicing to prevent crumbling. ⏰
Finishing Touches
A fine-mesh sieve distributes powdered sugar evenly for that professional finish. For presentation, use a serrated knife to cut clean wedges. Store leftovers in an airtight container at room temperature for 2 days or refrigerate for 4 days. Freeze unbaked tarts for 1 month—just add 10 extra minutes to baking time. ✨
Nutrition facts
Frequently asked questions
Can I make these tarts without a tart pan?
Use a 9-inch pie dish or even individual ramekins for mini tarts. For a rustic look, try baking in a cast-iron skillet lined with parchment paper. Just reduce baking time by 5-10 minutes since smaller pans conduct heat differently. The cheesecake layer will still set beautifully!
Why did my cheesecake layer crack?
Cracking usually happens from sudden temperature changes or overbaking. Open the oven door slightly during the last 5 minutes to let steam escape gradually. Also ensure your cream cheese is at room temperature—cold lumps can cause uneven texture. For extra insurance, bake at 325°F instead of 350°F to slow the cooking process.
How can I make these tarts ahead of time?
Assemble the crusts and fillings, then freeze them unbaked for up to 1 month. Bake straight from frozen, adding 10 extra minutes to the baking time. For storage, keep baked tarts in an airtight container at room temperature for 2 days or refrigerate for 4 days. The flavors actually improve overnight!
What's the best apple variety for this recipe?
Granny Smiths are ideal for their tartness and firm texture, but Honeycrisp or Braeburn work beautifully too. Avoid overly soft apples like Gala—they'll turn mushy during baking. For extra caramelization, toss the apples with 1 tbsp lemon juice before baking to prevent browning too quickly.
Can I substitute cream cheese in this recipe?
Yes! For a lighter texture, use ricotta mixed with lemon juice (same weight). For extra richness, try mascarpone (reduce sour cream to 0.25 cup). Never substitute cottage cheese—it's too watery. The key is maintaining the fat content for that signature creamy consistency.