
Desserts
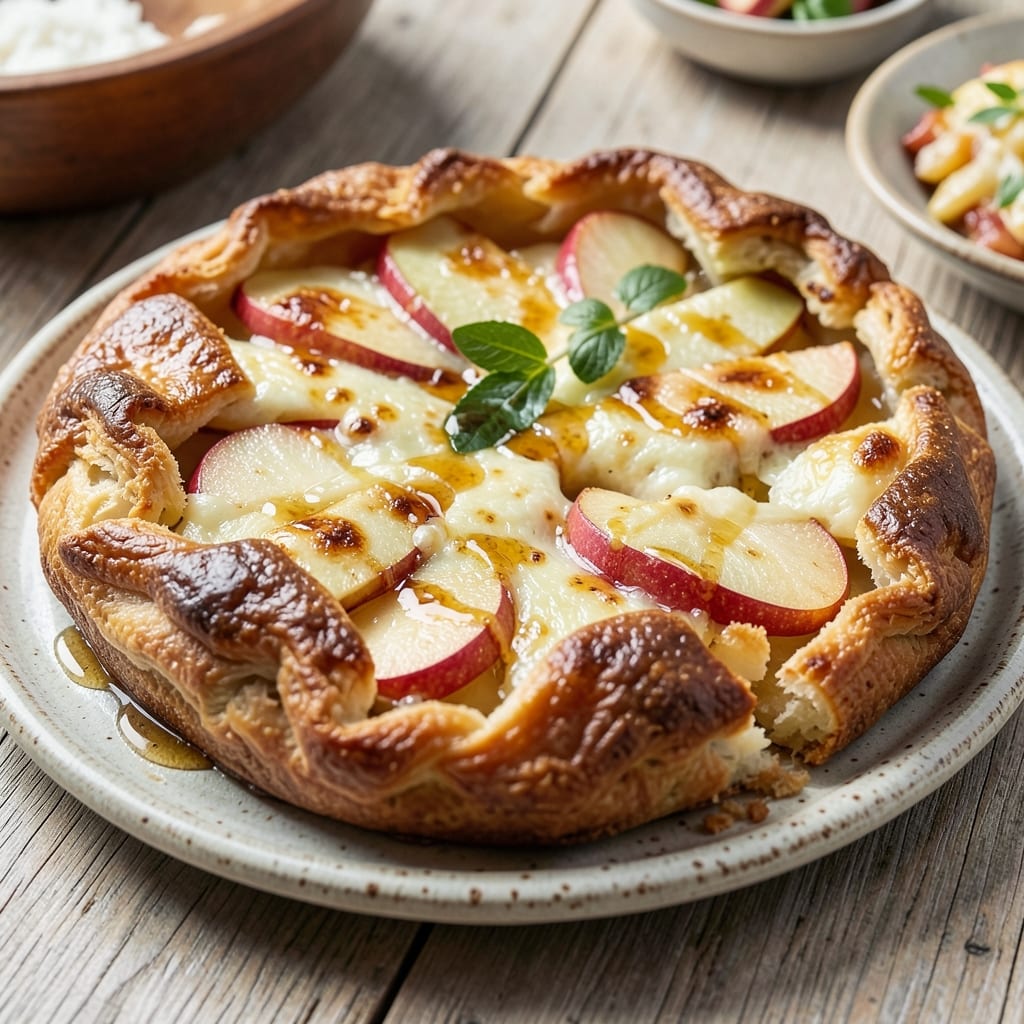
This apple cheddar galette recipe delivers the perfect balance of sweet and savory in every bite—flaky, golden crust embracing tender apples and sharp cheddar. 🍏 The secret lies in a simple buttery dough that encases a filling of spiced apples and melted cheese, creating a rustic free-form tart that's impossible to resist. I've perfected this technique over years of baking, ensuring the crust stays crisp while the filling remains gooey and flavorful.
The magic happens when you layer thinly sliced apples with crumbled cheddar and a touch of cinnamon, then fold the edges of the dough inward to create that signature galette shape. No rolling pin required—just gentle shaping by hand. Baking at 375°F for about 40 minutes ensures a perfectly golden crust with a tender interior, where the apples caramelize just enough to release their natural sweetness while the cheese adds a rich, savory contrast.
What you'll end up with is a warm, inviting dessert that's equally at home on a weekend brunch table or as an after-dinner treat. The flaky crust gives way to pockets of spiced apple and creamy cheddar, creating a harmony of textures and flavors that's both comforting and sophisticated. This recipe is designed to be flexible—use your favorite apple variety, swap in different cheeses, or add a drizzle of honey for extra sweetness.
Serve it warm with a scoop of vanilla ice cream or a dollop of whipped cream for the full experience. The best part? This galette is just as impressive as it is easy to make, proving that rustic baking doesn't have to be complicated. Let's get started!
Ingredients for apple cheddar galette
Flaky crust, spiced apples, and melty cheddar—just these 11 ingredients create magic.
| Ingredient | Amount | Notes |
|---|---|---|
| All-Purpose Flour 🌾 | 2 ½ cups | Sifted for light texture |
| Unsalted Butter 🧈 | ¾ cup | Cold, cubed for flakiness |
| Granulated Sugar 🍚 | ¼ cup | Plus 2 tbsp for filling |
| Salt 🧂 | ½ tsp | Fine sea salt preferred |
| Honeycrisp Apples 🍎 | 4 medium | Peeled, thinly sliced |
| Sharp Cheddar Cheese 🧀 | 1 ½ cups | Crumbled, aged variety |
| Ground Cinnamon 🌿 | 1 tsp | Plus extra for filling |
| Vanilla Extract 🥛 | ½ tsp | Pure extract preferred |
| Lemon Juice 🍋 | 1 tbsp | Freshly squeezed |
| Brown Sugar 🍚 | 2 tbsp | For filling sweetness |
| Heavy Cream 🥛 | ¼ cup | Optional for brushing |
The apples are non-negotiable here. Honeycrisp stays firm when sliced thin, but Granny Smith or Pink Lady work too. Grab them at Whole Foods or your local market when they're in season—they're sweeter and hold up better. The cheddar should be sharp and aged; Cabot or Tillamook are my go-tos. Skip the pre-shredded stuff—it gets gummy when melted. For the butter, Plugrá or Land O'Lakes unsalted work great, but make sure it's cold when you cut it into the flour. That's what makes the crust flaky.
No Honeycrisp? Fuji or Gala are solid backups. Want extra sweetness? Add 1 tbsp maple syrup to the filling. The cinnamon can be swapped for nutmeg or cardamom if you're feeling fancy. Short on cheddar? Gouda or Gruyère both add depth. The dough comes together fast—just mix the wet and dry ingredients until crumbly, then chill for 30 minutes. Don't skip this step; it keeps the crust from shrinking. For the filling, toss the apples with lemon juice to keep them from browning while you prep.
This galette tastes even better the next day, so make one extra. Store leftovers wrapped in parchment at room temperature for 2 days or in the fridge for 4 days. Reheat in a 350°F oven for 10 minutes to restore that crispy crust. Freeze the whole galette (unbaked) for up to 2 months—just thaw overnight before baking. The crust gets even more golden when reheated. Serve with vanilla ice cream or a drizzle of honey or caramel sauce for the full experience.
Why You'll Love This Recipe
- No-Roll Required: I swear by this—no fancy dough tricks. Just pat butter into flour until it looks like crumbs, then fold in apples. That’s it. (Yes, even my husband can handle it.)
- Sweet-Savory Magic: The sharp cheddar melts into the tender apples, while that caramelized sugar crust? Chef’s kiss. Honeycrisp stays juicy—no mushy disappointment here.
- Picnic to Potluck: Slice it warm for a brunch spread, pack it for lunch, or serve it cold with ice cream. Same dough, endless uses. (Pro tip: The leftovers reheat perfectly.)
- Budget-Friendly Feast: Flour, butter, apples—pantry staples you already own. One galette feeds four, and the crust’s crispy bits mean zero waste. (My wallet thanks me.)
Step-by-step instructions for apple cheddar galette
Here's how to build that irresistible flaky crust and spiced filling combo.
👨🍳 Step 1: Make the Perfect Dough
In a large bowl, combine the 2.5 cups all-purpose flour, 0.5 tsp salt, and 2 tbsp brown sugar. Whisk until evenly distributed—this prevents dry spots in your crust. Cut in the 1 cup cold cubed unsalted butter using a pastry cutter or your fingers until the mixture resembles coarse crumbs with pea-sized butter pieces remaining.
Add the 1 whole cold large egg and mix gently with a fork until just combined. Avoid overworking the dough—this develops gluten and makes the crust tough. Turn the dough out onto a lightly floured surface and shape it into a rough rectangle about ½-inch thick. Wrap tightly in plastic and refrigerate for at least 1 hour (or up to 24 hours). This chilling step is crucial for flaky layers.
🍳 Step 2: Prepare the Apple-Cheddar Filling
Peel and thinly slice the 4 medium Honeycrisp apples (about ¼-inch thick). Toss them in a large bowl with 1 tbsp lemon juice, 0.5 tsp vanilla extract, and the crushed 0.25 tsp allspice berries. This prevents browning and adds depth of flavor. Sprinkle with 1 tbsp ground cinnamon and mix gently.
In a separate bowl, combine the crumbled 1.5 cups sharp cheddar cheese with the 0.25 cup granulated sugar. Fold this mixture into the apple preparation, reserving about ¼ cup of the cheese-sugar mix for the top. The filling should look moist but not soupy—if it seems too wet, pat the apples dry with a paper towel before mixing.
🥘 Step 3: Assemble the Galette
Preheat your oven to 375°F. On a lightly floured surface, roll out the chilled dough to about ⅛-inch thickness in a 12-inch circle. Gently transfer it to a parchment-lined baking sheet. Spoon the apple-cheddar filling onto the center of the dough, leaving a 2-inch border around the edges.
Here's the trick: Fold the edges of the dough up and over the filling, then gently pleat them toward the center. This creates that classic rustic galette shape. Brush the exposed dough with cold water, then sprinkle with the reserved cheese-sugar mix and 2 tbsp coarse sugar. The sugar will caramelize beautifully during baking.
🔥 Step 4: Bake to Golden Perfection
Bake for 40-45 minutes until the crust is deep golden brown and the filling is bubbling. The edges should look crisp and slightly puffed, while the center should still have some softness. If the crust browns too quickly, loosely cover the edges with aluminum foil after 25 minutes to prevent over-browning.
Let the galette cool for 15 minutes before serving—this allows the filling to set slightly and makes slicing easier. The contrast of crispy, flaky crust with warm, spiced apple-cheddar filling is what makes this galette so special. Serve warm with vanilla ice cream or whipped cream for the ultimate dessert experience.
Pro Tips For Making Apple Cheddar Galette
- Preheat That Pan: The crust won’t crisp properly if your cast-iron or baking sheet is cold. Get it smoking hot on the stove for 3-4 minutes before adding the dough—this guarantees that golden, shatterable edge everyone craves. (Yes, even if you’re impatient like me.)
- Salt the Apples: A pinch of salt (about ¼ teaspoon) tossed with your sliced apples before baking draws out moisture and makes them caramelize faster. I learned this the hard way—watery apples turn soggy crusts, and nobody wants that.
- Don’t Overcrowd the Filling: Pile the apples too high, and the center won’t cook through while the edges burn. Spread them in a single layer, overlapping slightly, then fold the dough edges just enough to seal—this keeps the filling crisp and the crust from getting weighed down.
- Brush with Honey: Skip the extra sugar on top and brush the baked galette with a little melted butter mixed with honey (about 1 tablespoon each) right after pulling it from the oven. It adds a glossy finish and balances the sharp cheddar without cloying sweetness. (Your future self will thank you.)
Pro cooking tips for apple cheddar galette
Dough Temperature Secrets
The cold butter and chilled dough are non-negotiable for that perfect flaky texture. I always keep my butter cubes in the freezer for 5 minutes before cutting them into the flour—this ensures they stay firm when mixed. The dough should feel cool to the touch when you shape it, almost like it has a slight resistance. If your kitchen feels warm, refrigerate the dough for an extra 15 minutes before rolling. This might seem like overkill, but trust me, it makes all the difference in preventing a tough crust. 🧈
Filling Moisture Control
Getting the filling just right is an art—too wet and it leaks, too dry and it's bland. After tossing your apples with lemon juice, I always pat them dry with paper towels to remove excess moisture. The cheddar-sugar mix should be crumbled finely but not powdered, and it should just barely coat the apples. If your filling looks soupy, sprinkle an extra ½ teaspoon of flour over the top before assembling. This creates a subtle barrier that keeps the crust crisp while letting the filling stay juicy. 🍏
Edge Folding Technique
Most people struggle with the classic galette fold, but here's my foolproof method: Start by gathering the dough edges about 2 inches from the filling. Lift and fold them inward at 45-degree angles, then pleat them gently toward the center like you're making a little nest. The key is to keep the folds loose and even—don't press too hard or the crust will get dense. I like to use my fingers to create small pleats about ½-inch apart. This creates those beautiful, irregular edges that make galettes look so rustic. 🥧
Baking Time Precision
Your oven might run hot or cold, so I recommend checking your galette at 35 minutes—it should be golden but still slightly soft. The filling should be bubbling, but the center should have a gentle wobble when you shake the pan. If the crust browns too quickly, cover the edges with foil at 25 minutes and continue baking. The internal temperature should reach 190°F when done. Overbaking is the #1 mistake—it turns the crust tough and dries out the filling. Let it cool for 15 minutes before slicing, or the filling will run everywhere. ⏱️
Sugar Caramelization Hacks
That beautiful caramelized sugar on top isn't just for looks—it adds incredible depth of flavor. I always use coarse sugar (like turbinado) because it caramelizes more dramatically than granulated. Sprinkle it generously over the pleated edges right after brushing with water. For extra crunch, I sometimes add 1 teaspoon of flaky sea salt mixed into the coarse sugar. The salt enhances the sweetness and adds a sophisticated finish. 🍯
Make-Ahead Mastery
This galette tastes even better the next day, so I always make it ahead when possible. Assemble the galette, then refrigerate it unbaked for up to 24 hours before baking. For longer storage, wrap the baked galette tightly in foil and keep it at room temperature for 3 days, or refrigerate for 1 week. To reheat, warm slices at 350°F for 5-7 minutes until the crust is crisp again. The flavors meld beautifully overnight, making it perfect for breakfast or dessert the next day. ⏰
Nutrition facts
Frequently asked questions
Can I use a different type of cheese instead of cheddar?
For a milder flavor, try Gouda or Gruyère, which melt beautifully and add nutty depth. If you prefer something sharper, Pepper Jack works well but may need a touch more sugar in the filling to balance the heat. Avoid pre-shredded cheese—it contains anti-caking agents that make the crust soggy.
What's the best way to prevent a soggy crust?
Chill the dough for at least 1 hour before rolling, and keep the filling moist but not dripping. Pat sliced apples dry with paper towels, and sprinkle ½ tsp flour over the top before folding the edges. Brushing the exposed dough with cold water before baking creates a barrier that keeps it crisp.
Can I make this galette ahead of time?
Yes! Assemble the unbaked galette and refrigerate it for up to 24 hours before baking. For leftovers, store wrapped at room temperature for 3 days or refrigerate for 1 week. Reheat slices at 350°F for 5-7 minutes to restore crispiness—it tastes even better reheated!
How do I know when the galette is fully baked?
The crust should be deep golden brown, and the edges should look crisp with a slight puff. The filling should be bubbling, but the center should still have a gentle wobble when you shake the pan. Use an instant-read thermometer—it's done when the internal temperature reaches 190°F.
What if my galette looks messy or uneven?
That's totally normal! Galettes are meant to look rustic. The imperfect edges and uneven folds are part of their charm. If the filling leaks during baking, it just means it was too wet—next time, pat the apples extra dry. The flavor won't be affected!