
Desserts
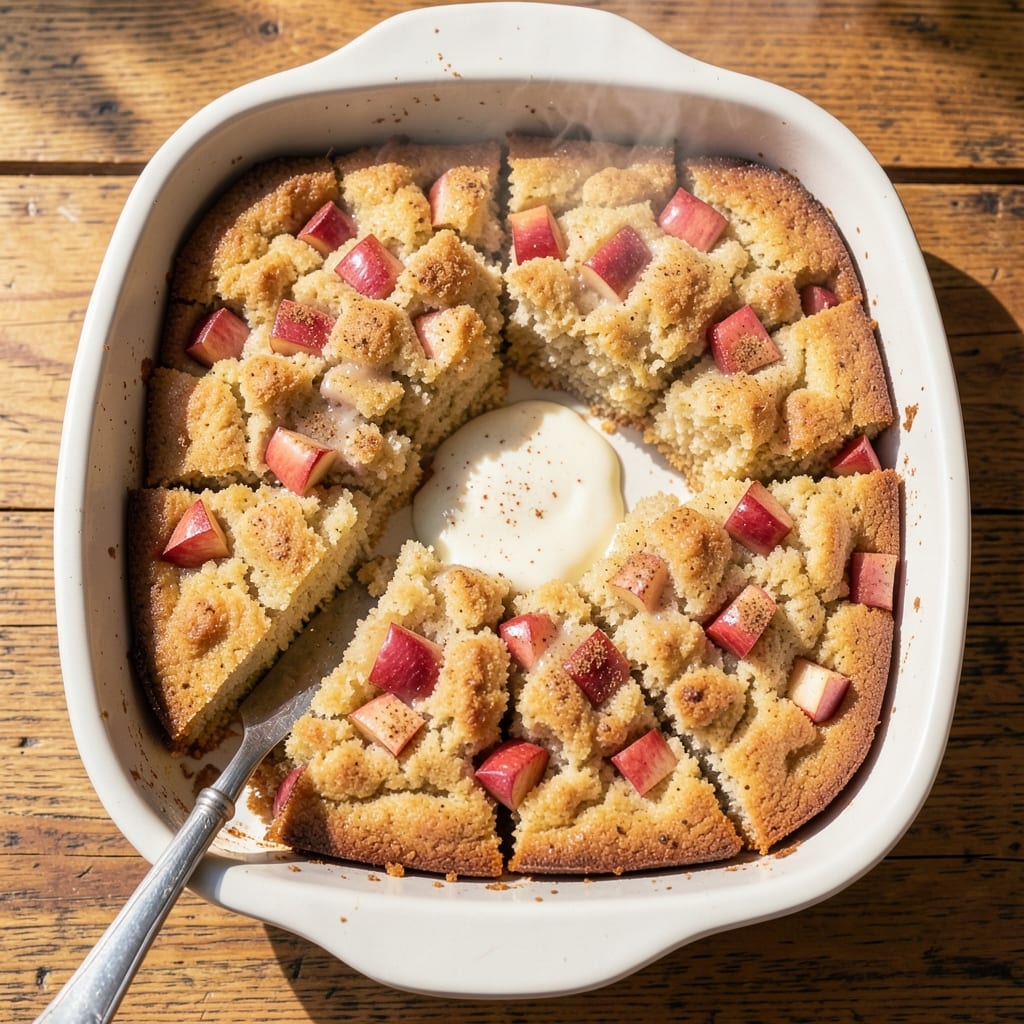
This apple cake squares recipe delivers the perfect balance of tender cake, spiced apple filling, and a crispy streusel top—all baked into easy-to-slice squares. The secret lies in layering a moist vanilla cake with a warm cinnamon-apple mixture, then crowning it with buttery oats and brown sugar for that irresistible crunch. I developed this recipe after years of testing, ensuring every bite has the right texture and flavor harmony. The beauty of this dessert is its simplicity—just a few pantry staples come together to create something restaurant-worthy. You’ll start with a classic vanilla cake base, then fold in finely chopped apples and spices for that signature autumnal taste. The streusel topping, made with rolled oats and melted butter, bakes to a golden, crisp finish that contrasts perfectly with the soft layers beneath. By the time it emerges from the oven, you’ll have a crispy-edged, warmly spiced cake that’s easy to cut into perfect squares. The apples stay tender while the streusel adds a satisfying crunch, making this dessert ideal for potlucks, holiday gatherings, or a cozy weekend treat. Serve warm with a scoop of vanilla ice cream or a dusting of powdered sugar for extra indulgence. This recipe is designed to be foolproof, with clear steps for layering and baking. Whether you’re a seasoned baker or just starting out, the instructions will guide you through every stage—from mixing the batter to achieving that golden, crispy streusel top. Let’s get baking!
Ingredients for apple cake squares
Pantry staples plus a few apples—everything you need for restaurant-worthy cake squares.
| Ingredient | Amount | Notes |
|---|---|---|
| All-Purpose Flour 🌾 | 2 ½ cups | Sifted for light texture |
| Granulated Sugar 🍚 | 1 ½ cups | White or light brown |
| Unsalted Butter 🧈 | 1 cup | Cold, cubed for streusel |
| Large Eggs 🥚 | 2 whole | Room temperature preferred |
| Vanilla Extract 🌸 | 2 tsp | Pure extract, not imitation |
| Baking Powder 🧂 | 2 tsp | Diamond Crystal preferred |
| Salt 🧂 | ½ tsp | Fine sea salt preferred |
| Apples 🍎 | 2 medium | Honeycrisp or Granny Smith, peeled |
| Ground Cinnamon 🌿 | 1 ½ tsp | Freshly ground for warmth |
| Ground Nutmeg 🌿 | ¼ tsp | Freshly grated preferred |
| Rolled Oats 🌾 | 1 cup | Old-fashioned, not quick |
| Light Brown Sugar 🍚 | ½ cup | Packed firmly |
| Powdered Sugar 🍚 | 2 tbsp | For dusting top |
The apples are the heart of this recipe. Honeycrisp stays tender while holding shape, but Granny Smith adds tartness that balances the sweetness. Grab them at Whole Foods or your local market—they should feel firm and heavy for their size. Peel and chop them into even 1/4-inch pieces (no need to be perfect, but consistent sizing helps them cook evenly). I always wash them first, then peel while they're still dry to avoid slipping. Store any extra apples in the fridge for up to 1 week—they'll keep longer if you leave the stems on.
No Honeycrisp? Fuji or Gala work in a pinch, but they'll be less juicy. Short on brown sugar? White sugar plus a pinch of molasses mimics that caramel flavor. The oats are key for texture—Old-fashioned, not quick. Quick oats get mushy. For the streusel, butter matters: use cold, cubed butter for maximum crispiness. Prefer a sweeter cake? Add 1/4 cup more sugar to the batter. The cinnamon and nutmeg are non-negotiable for that warm spice flavor—don't skip them, even if you're not a fan of nutmeg.
This cake keeps beautifully. Wrap tightly in plastic wrap and store at room temperature for 3 days—the streusel stays crisp, and the apples don't dry out. For longer storage, freeze the whole cake (unwrapped) for up to 3 months. To serve, let it sit at room temperature for 10 minutes—this helps the layers separate cleanly when you cut squares. I always dust with powdered sugar right before serving (that's why it's listed as an ingredient). The cake reheats wonderfully—pop squares in the oven at 350°F for 5-7 minutes to revive that fresh-from-the-oven warmth.
Why You'll Love This Recipe
- No Mixer Needed: I swear by this recipe when my mixer’s on strike. Creaming the butter and sugar by hand gives those squares a tender crumb—no electric help required. (Yes, even on a Tuesday night.)
- Vanilla-Butter Magic: That warm vanilla swirled into buttery layers? It’s the kind of flavor that makes you pause mid-bite. The sugar caramelizes just enough to give it a subtle, grown-up sweetness without being cloying.
- Office Snack Hero: Between us, these squares are my secret weapon for work lunches. They hold up for days in the fridge, stay moist wrapped in foil, and—bonus—no one can resist the buttery crust when it’s time to share.
- Pantry Staple Power: Honestly, you’ve got this covered if your kitchen has flour, sugar, and butter. No specialty ingredients, no last-minute grocery runs. The eggs and vanilla are just the cherry on top of a recipe that’s already foolproof.
Step-by-step instructions for apple cake squares
Here's how to make these moist apple cake squares with that perfect crispy streusel topping.
Prepare the Apple Filling
Peel and finely chop the 2 medium apples into small, even pieces—about the size of a pea. You want them small enough to soften but still retain some texture. In a medium bowl, combine the chopped apples with the 2 teaspoons cinnamon and 0.5 teaspoon ground ginger. Toss gently to coat the apples evenly with the spices. Set this mixture aside while you prepare the cake batter.
I like to use a mix of sweet and tart apples for this recipe—Granny Smiths add brightness while Honeycrisp or Fuji apples bring natural sweetness. If your apples are particularly juicy, you can lightly toss them with 1 teaspoon of the all-purpose flour to help absorb some of the moisture before mixing with the batter.
Mix the Cake Batter
In a large mixing bowl, combine the 2.5 cups all-purpose flour, 1.5 cups granulated sugar, 2 teaspoons baking powder, and 0.5 teaspoon salt. Whisk these dry ingredients together until well blended—this ensures even distribution of leavening agents throughout the batter. In a separate bowl, beat the 1 cup softened unsalted butter and 2 whole large eggs until light and fluffy, about 2 minutes with an electric mixer.
Gradually add the dry ingredients to the butter mixture while mixing on low speed, alternating with the 2 teaspoons vanilla extract. Mix just until combined—don't overmix or the cake will become dense. Then fold in the prepared apple mixture using a spatula, being careful not to break up the apples too much. The batter should be thick but still pourable.
Prepare the Streusel Topping
In a separate bowl, combine the 1 cup rolled oats, 0.5 cup packed brown sugar, 0.5 cup chopped walnuts, and 2 tablespoons powdered sugar. Mix these ingredients together until well distributed. The walnuts should be evenly coated with the brown sugar mixture. This topping is what creates that beautiful crispy texture on top of your cake squares.
I always toast the walnuts first for about 5 minutes in a dry skillet over medium heat, stirring constantly, until they're fragrant and lightly golden. This adds an extra depth of flavor to the streusel. Let them cool completely before mixing with the other ingredients to prevent the butter from melting prematurely.
Assemble and Bake
Preheat your oven to 350°F. Grease a 9x9-inch baking dish or line it with parchment paper for easy removal. Pour the cake batter evenly into the prepared baking dish and spread it out to form a thin layer—about 1 inch thick. Sprinkle the streusel topping evenly over the top, pressing down gently with your fingers to help it adhere to the batter.
Bake for 35-40 minutes, or until the top is golden brown and the edges are pulling away slightly from the pan. The cake should feel firm to the touch when gently pressed in the center. If the streusel isn't quite brown enough after 35 minutes, you can broil it for 1-2 minutes at the end, watching closely to avoid burning.
Cool and Serve
Remove the cake from the oven and let it cool in the pan for 10 minutes before transferring to a wire rack to cool completely. The cake will be warm and moist when first removed, but it will set up nicely as it cools. For that perfect presentation, dust the top with an additional 1 tablespoon powdered sugar just before serving.
These apple cake squares are best served warm or at room temperature. The contrast of the warm, spiced apple filling with the crispy streusel topping makes each bite irresistible. Cut into squares and enjoy with a cup of tea or coffee—you'll love how the flavors come together perfectly.
Pro Tips For Making Apple Cake Squares
- Cream Butter Properly: Whip that butter and sugar until it’s light and fluffy—not just pale, but when you lift the beaters, the ribbon should hold for a full 5 seconds. I used to rush this, and the cake turned out dense. (Yes, even if you’re impatient like me.)
- Use Cold Apples: Slice your apples thin and toss them in lemon juice, then refrigerate for 10 minutes before folding into the batter. Cold apples release less moisture, so your cake stays tender, not soggy. I learned this the hard way after a batch turned into a wet mess.
- Avoid Overmixing the Batter: Mix the dry ingredients and wet ingredients separately, then combine just until combined—no more. Overmixing develops gluten, and your cake squares will turn out tough instead of light. Stop when there are a few flour streaks left.
- Bake in Two Stages: Start at 350°F (175°C) for 20 minutes, then drop to 325°F (165°C) for the remaining 25-30 minutes. The lower temp at the end ensures even baking without a dry top. I was skeptical until I tried it—now it’s non-negotiable.
Storing and reheating your apple cake squares
Room-Temp Storage
Store your apple cake squares at room temperature in an airtight container for up to 3 days. The streusel stays perfectly crisp while the apples maintain their tender texture. I like using glass containers with tight-sealing lids—they keep the cake fresher longer than plastic. Let the cake cool completely before storing to prevent condensation from making the streusel soggy. 🍎
Fridge Preservation
For longer storage, refrigerate the cake in an airtight container for up to 5 days. The cold temperature helps preserve the streusel's crunch, though it may soften slightly. To revive, let the squares sit at room temperature for 15-20 minutes before serving. I find the flavors actually deepen after a day or two in the fridge, making it perfect for meal prep.
Freezer-Friendly
Freeze the entire cake (unwrapped) for up to 3 months for maximum freshness. Wrap tightly in plastic wrap followed by aluminum foil to prevent freezer burn. To serve, thaw overnight in the fridge, then warm in the oven at 350°F for 5-7 minutes to restore that fresh-baked texture. The apples stay juicy, and the streusel regains its crispiness beautifully. ✨
Reheating Secrets
For a quick warm-up, pop individual squares in the oven at 350°F for 5-7 minutes until the edges are golden. Microwave reheating works too—cover with a damp paper towel and heat for 15-20 seconds on medium power. The key is to avoid overcooking, which can dry out the cake. I always reheat just until the streusel is fragrant and the apples are warm through.
Serving Warm
For the best experience, serve warm squares straight from the oven or reheated. The contrast of warm, spiced apples with crisp streusel is unbeatable. Dust with powdered sugar right before serving to add that final touch of sweetness. Pair with a cup of chai tea or vanilla ice cream for the ultimate dessert experience. 💛
Nutrition facts
Frequently asked questions
Can I make this recipe without apples?
The apples are essential for the signature flavor, but you can substitute with 1 cup of finely chopped dried apricots or 1 cup of blueberries for a different twist. Soak dried fruit in warm water for 10 minutes first to rehydrate. The texture will differ slightly, but the cake structure remains the same.
Why does my streusel topping get soggy?
Soggy streusel usually means the butter melted too early or the cake wasn't fully baked. Use cold, cubed butter and bake at 350°F for the full 35-40 minutes—don't cut time short! For extra insurance, sprinkle 1 tablespoon of all-purpose flour over the streusel before baking. This creates a barrier that keeps it crisp.
How do I cut perfect squares?
Let the cake cool completely first—this prevents crumbling. Use a sharp chef's knife and dip it in hot water between cuts for clean lines. For 9x9-inch cakes, cut into 3 rows x 3 columns for 9 equal squares. Press down gently when cutting to avoid tearing the layers.
Can I make this gluten-free?
Yes! Replace the all-purpose flour with a 1:1 gluten-free baking flour blend (like Bob's Red Mill) and add 1 teaspoon xanthan gum to the dry ingredients. The streusel will still crisp up nicely, but check for gluten-free oats. Keep all other measurements identical. Taste test the batter—gluten-free cakes can be drier, so you might need 1 extra tablespoon of milk.
What's the best way to serve these?
Warm squares are ideal—serve straight from the oven with a scoop of vanilla ice cream or a dollop of whipped cream. For a fancy touch, dust with powdered sugar and garnish with a sprinkle of cinnamon. They also make great breakfast pastries with a cup of coffee or chai. The contrast of warm cake and crisp streusel is unbeatable!