
Desserts
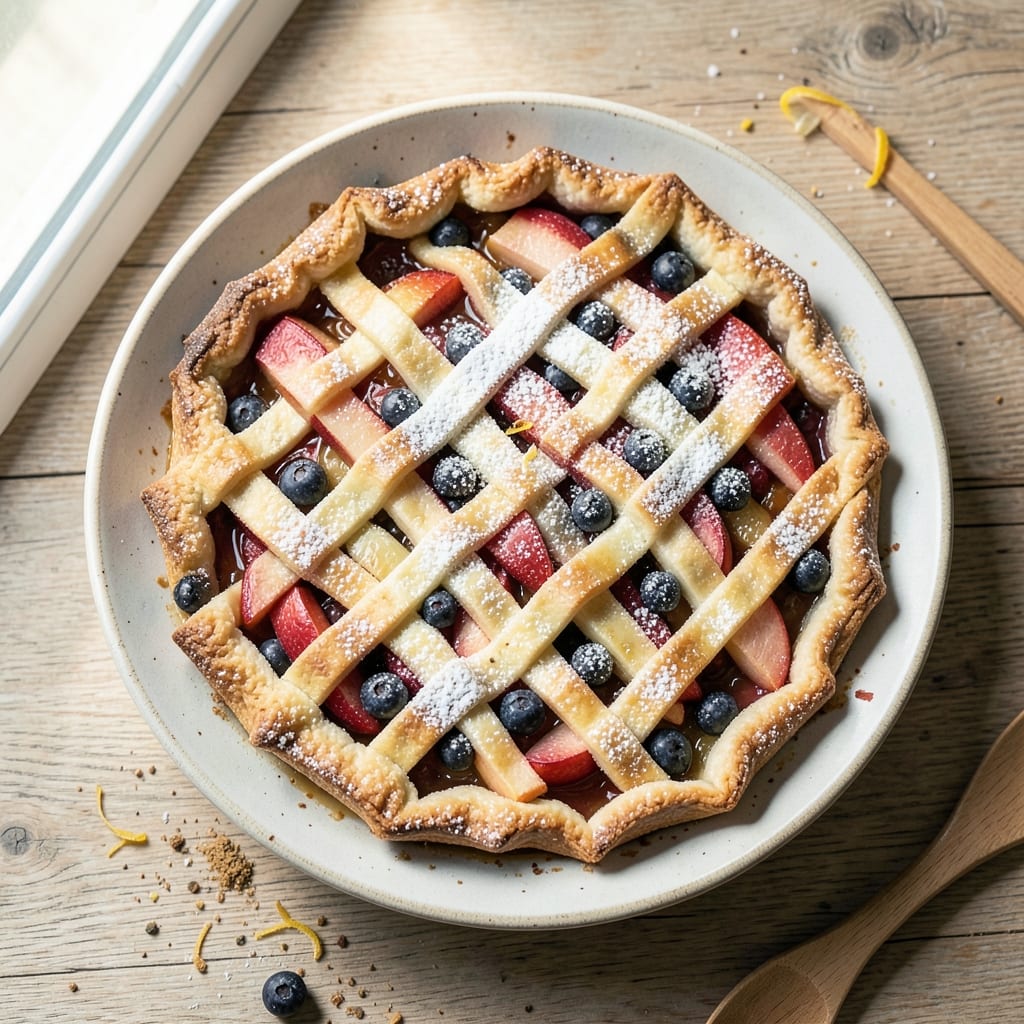
This apple blueberry galette recipe delivers rustic charm with a juicy, spilling-over filling that tastes like autumn in every bite. The secret lies in a simple buttery crust that encases tender sautéed apples and tart blueberries, creating a dessert that's both elegant and effortless. I've perfected the technique to ensure a crispy bottom and flaky layers, while the fruit releases its natural juices during baking for that signature rustic appeal.
The process begins with a basic pie dough—whether homemade or store-bought—that gets rolled out and folded around the fruit filling. What sets this galette apart is the way the edges are tucked inward, creating that iconic rustic look while preventing a soggy bottom. The filling combines sweet-tart apples with juicy blueberries, tossed in a touch of lemon juice and cinnamon for balance, then baked until golden and bubbling.
By the time it emerges from the oven, you'll have a dessert that looks like it came straight from a French bakery—golden crust with fruit spilling over the edges, caramelized in spots and still tender inside. The aroma alone will have everyone gathering around the table, and each bite delivers that perfect mix of crispy crust, soft fruit, and buttery richness.
Serve warm with a dusting of powdered sugar and a scoop of vanilla ice cream for the full experience. This galette is perfect for brunch gatherings, holiday desserts, or whenever you crave something that feels both special and simple to make. Let's get baking!
Ingredients for apple blueberry galette
Juicy apples and tart blueberries meet a flaky crust for this autumn-inspired dessert that feels special yet simple.
| Ingredient | Amount | Notes |
|---|---|---|
| All-Purpose Flour 🌾 | 2 ½ cups | Plus 2 tbsp for rolling |
| Unsalted Butter 🧈 | ¾ cup | Cold, cubed for crust |
| Granulated Sugar 🍚 | ¼ cup | Plus 2 tbsp for sprinkling |
| Granny Smith Apples 🍎 | 4 medium | Peeled, sliced 1/4-inch thick |
| Fresh Blueberries 🫐 | 1 ½ cups | Picked over for stems |
| Lemon Juice 🍋 | 2 tbsp | Freshly squeezed |
| Ground Cinnamon 🌿 | 1 ½ tsp | Freshly toasted preferred |
| Salt 🧂 | ½ tsp | Fine sea salt preferred |
| Powdered Sugar 🍚 | ¼ cup | For dusting after baking |
| Vanilla Ice Cream 🍦 | 1 ½ cups | For serving (optional) |
| Heavy Cream 🥛 | ¼ cup | For brushing crust (optional) |
The apples are the heart of this galette—Granny Smiths give that perfect tartness to balance the sweet blueberries. Freshly picked or organic apples from the store work best, but any crisp variety will do. I like to slice them just before tossing with the blueberries so they don't brown. For the butter, use European-style if you can find it—it has more fat content for that signature flakiness. Kirkland or Plugrá are my go-tos at the grocery store. If you're making this ahead, slice the apples and store them in lemon water to keep them bright.
No Granny Smiths? Honeycrisp or Fuji work beautifully too. Short on blueberries? Substitute with raspberries or blackberries, but reduce the lemon juice to 1 tbsp since they're less tart. The cinnamon is non-negotiable—it's what makes this taste like autumn. If you want extra richness, brush the crust with melted butter after baking. For the powdered sugar, sift it before dusting to avoid lumps. The ice cream is optional but recommended—vanilla or salted caramel both pair perfectly.
This galette keeps well for 2 days at room temperature, wrapped in a clean kitchen towel to stay moist. For longer storage, freeze the baked galette for up to 3 months. Reheat in a 350°F oven for 10-15 minutes to restore crispness. I always make an extra one—it reheats beautifully for breakfast the next morning. The crust stays crispy when stored properly, but if it gets soft, just reheat it for a minute or two.
Why You'll Love This Recipe
- No-Fuss Assembly: I swear by this galette because it’s the kind of recipe that lets you not stress. Toss sliced Granny Smiths and blueberries into a bowl with a sprinkle of sugar, fold in a pre-made dough (or mix your own in 5 minutes), and you’re done. No fussing with lattice crusts or precise layers—just fold, bake, and admire how effortlessly it comes together.
- Crisp-Tart Magic: That first bite? Pure contrast—flaky butter crust giving way to tangy Granny Smiths and juicy blueberries bursting with sweetness. The sugar caramelizes just enough to make every slice taste like a dessert, but it’s so balanced you’d never guess it’s basically a freezer-friendly pie.
- Weekend or Weeknight: Honestly, this is my secret weapon for brunch, potlucks, or lazy Sunday mornings. Serve it warm with vanilla ice cream or let it cool for a picnic-worthy treat. It’s the kind of dish that works just as well reheated for breakfast the next day—no one will believe it’s not homemade.
- Leftovers? No Problem: Between us, I almost always make a double batch because it reheats like a dream. Stash slices in the fridge for quick breakfasts or pack them in lunches—the crust stays crisp, the fruit stays juicy, and you’ll save money by not ordering pastries. Plus, it’s the kind of dessert that disappears fast, so you won’t regret making extra.
Step-by-step instructions for apple blueberry galette
Here's how to create a rustic, free-form tart with fruit so juicy it spills over the edges.
Prepare the Crust Dough
In a large bowl, combine the 2.5 cups all-purpose flour and 0.5 tsp salt. Cut in the 0.75 cup cold, cubed unsalted butter using a pastry cutter or your fingers until the mixture resembles coarse crumbs with pea-sized butter pieces. This texture is crucial—it ensures a flaky crust.
Add 0.25 cup granulated sugar and mix until evenly distributed. Sprinkle 0.25 cup ice water (start with this amount—you may need 1-2 more tablespoons) and stir with a fork until the dough just comes together. Avoid overmixing; the dough should be shaggy but hold when pressed. Shape into a disk, wrap in plastic, and refrigerate for at least 1 hour (or up to 24 hours).
Assemble the Fruit Filling
Preheat oven to 375°F. In a large bowl, toss the 4 medium peeled Granny Smith apples (sliced ¼-inch thick) with 1.5 cups fresh blueberries, 1.5 tsp ground cinnamon, 2 tbsp lemon juice, and 2 tbsp granulated sugar. The lemon juice prevents browning while the sugar balances the tartness of the apples and sweetness of the berries.
Spread the fruit mixture in a 10-inch circle on a parchment-lined baking sheet, leaving a 2-inch border for the crust. The fruit should be in a single layer—don't overcrowd it. This arrangement allows the juices to pool beautifully and creates that signature galette spillover effect.
Roll and Shape the Crust
On a lightly floured surface, roll the chilled dough into a 12-inch circle (about ⅛-inch thick). If it cracks, gently press it back together—don't worry about perfection. Transfer the dough to the baking sheet with the fruit, draping it over the top and letting the edges extend 2-3 inches beyond the fruit.
Fold the excess dough inward, creating a rustic, irregular edge. Brush the crust with 0.25 cup heavy cream (or melted butter) and sprinkle with the remaining 2 tbsp granulated sugar. This creates a golden, caramelized crust while balancing the tart fruit flavors. Leave the center open—this is what makes a galette a galette.
Bake Until Golden and Juicy
Bake for 40-45 minutes until the crust is deep golden brown and the fruit is bubbling. The edges should be crisp, but the center should remain slightly soft. If the crust browns too quickly, tent loosely with foil after 25 minutes.
Remove from oven and let cool for 10 minutes before transferring to a wire rack. The filling will continue to release juices as it cools, creating that perfect balance of warm crust and fruity center. Serve warm with 1.5 cups vanilla ice cream and dust with 0.25 cup powdered sugar for an elegant finish.
Serve with Confidence
Slice into wedges and serve immediately. The contrast of warm, spiced fruit against cool ice cream is what makes this galette unforgettable. Each bite should deliver juicy apple and berry bursts with a flaky, buttery crust that holds up beautifully.
Real talk: If the crust puffs too much, it's still delicious—just adjust your rolling technique next time. The key is patience with the dough and not overworking the fruit. Trust the process, and you'll have a showstopping dessert that looks rustic but tastes like it took hours to perfect.
Pro Tips For Making Apple Blueberry Galette
- CHILL THE APPLES FIRST: I learned this the hard way—slicing Granny Smiths straight from the fridge makes them release way too much liquid, turning your filling into soup. Toss the peeled slices in cold water for 10 minutes, then drain and pat very dry before tossing with sugar and blueberries. This keeps the texture crisp and the galette from getting soggy.
- TOSSED BERRIES STICK BETTER: Skip the pre-mixing with flour—tossing blueberries in a tiny bit of sugar (about 1 teaspoon) and lemon juice (½ teaspoon) before folding them into the apple mixture makes them cling to the fruit instead of sinking to the bottom. The acidity also softens the skins just enough to burst when baked.
- DOCK THE CRUST RIGHT: Poke holes all over the rolled-out dough with a fork, but don’t go crazy—aim for ¼-inch gaps. This lets steam escape without letting the filling puff up like a soufflé. I used to skip this, and my crusts always ended up looking like overinflated balloons instead of rustic and golden.
- USE COLD BUTTER FOR CRISP: Cut that unsalted butter into the flour last and keep it cold—this isn’t the time to get fancy with your fingers. The goal is pea-sized chunks that melt just enough to bind the dough, not disappear into a greasy paste. If your dough feels too soft, chill it 15 minutes before rolling. Trust me, your crust will thank you.
Make-ahead tips for this recipe
Prep Ahead Strategy
The galette's crust can be made up to 2 days in advance—this is my favorite time-saver. Shape the dough into a disk, wrap tightly in plastic, and refrigerate. When ready to bake, simply roll it out and assemble. For the fruit, slice the apples and store them in a bowl with 2 tbsp lemon juice and 1 tbsp water to prevent browning. Keep refrigerated until ready to toss with blueberries. This keeps everything fresh and bright for baking. 🍎
Fruit Prep Shortcut
Save time by using pre-sliced apples from the store—just rinse and pat dry before tossing with blueberries. If you're really short on time, use frozen blueberries (thawed and drained) instead of fresh. The texture won't be identical, but it still delivers that sweet-tart flavor. I've made this galette with frozen berries in a pinch, and it was still delicious. Just add 1 tsp cornstarch to the fruit mix to absorb extra moisture. 🫐
Bake and Store
Bake the galette as directed, then let it cool completely before storing. For short-term storage (2 days), wrap the cooled galette in a clean kitchen towel and keep at room temperature. The towel helps maintain moisture. For longer storage, freeze the entire galette (without wrapping) in a ziplock freezer bag for up to 3 months. Thaw overnight in the fridge before reheating. 🥶
Reheating Perfection
To restore that golden crust and warm filling, reheat the galette in a 350°F oven for 10-15 minutes on a baking sheet. For a quicker option, wrap the galette in foil and warm it in the oven for 5 minutes, then uncover and warm 5 more minutes to crisp the edges. If you prefer stovetop reheating, place slices in a skillet over medium-low heat for 2-3 minutes per side until warm through. 🔥
Make-Ahead Serving
This galette reheats beautifully for breakfast the next day—just slice and serve with a dollop of whipped cream or extra ice cream. For a special touch, brush the reheated slices with a little melted butter and sprinkle with toasted pecans or candied walnuts. I love making an extra galette just for this purpose—it's a fantastic way to repurpose leftovers into a delicious morning treat. ✨
Freezer-Friendly Assembly
For ultimate convenience, assemble the galette completely (with the fruit and crust in place) and freeze it unbaked. Wrap tightly in plastic wrap followed by a layer of foil. When ready to bake, thaw in the fridge overnight, then bake as directed—just add 5-10 minutes to the baking time since it starts cold. This method preserves the fruit's juiciness and ensures a perfectly crisp crust. 💫
Nutrition facts
Frequently asked questions
Can I use store-bought pie dough for this recipe?
Store-bought pie crust works perfectly for this galette. Look for a buttery, flaky variety (like Pillsbury) and chill it for 20 minutes before rolling to make it easier to handle. Just reduce the sugar in the crust by 1 tablespoon since store-bought dough already contains some.
How do I prevent the crust from getting soggy?
Prevent a soggy bottom by pre-baking the crust for 5 minutes at 375°F before adding the fruit. Another trick is to sprinkle 1/4 cup cornstarch over the fruit before assembling. The cornstarch absorbs excess moisture while baking, keeping the crust crisp.
Can I make this galette gluten-free?
Yes, but you'll need a gluten-free pie crust recipe. Use a 1:1 gluten-free flour blend with 1/4 cup xanthan gum for structure. Chill the dough longer (2 hours) and handle gently to prevent cracking. The fruit filling can remain the same, but expect slightly less flakiness in the crust.
What's the best way to serve leftover galette?
Leftover galette is perfect for breakfast! Slice into wedges and reheat in a 350°F oven for 10 minutes until warm. Serve with whipped cream or vanilla ice cream for dessert, or with Greek yogurt for a lighter morning option. You can also toast slices in a skillet for 2 minutes per side.
Why did my galette turn out flat instead of puffy?
Overworking the dough or using warm butter causes flat galettes. Keep the butter cold and cubed, handle the dough minimally, and don't roll it too thin. For extra height, add 1/2 teaspoon baking powder to the crust dough. Also ensure your oven rack is in the middle position for even heat circulation.