
Desserts
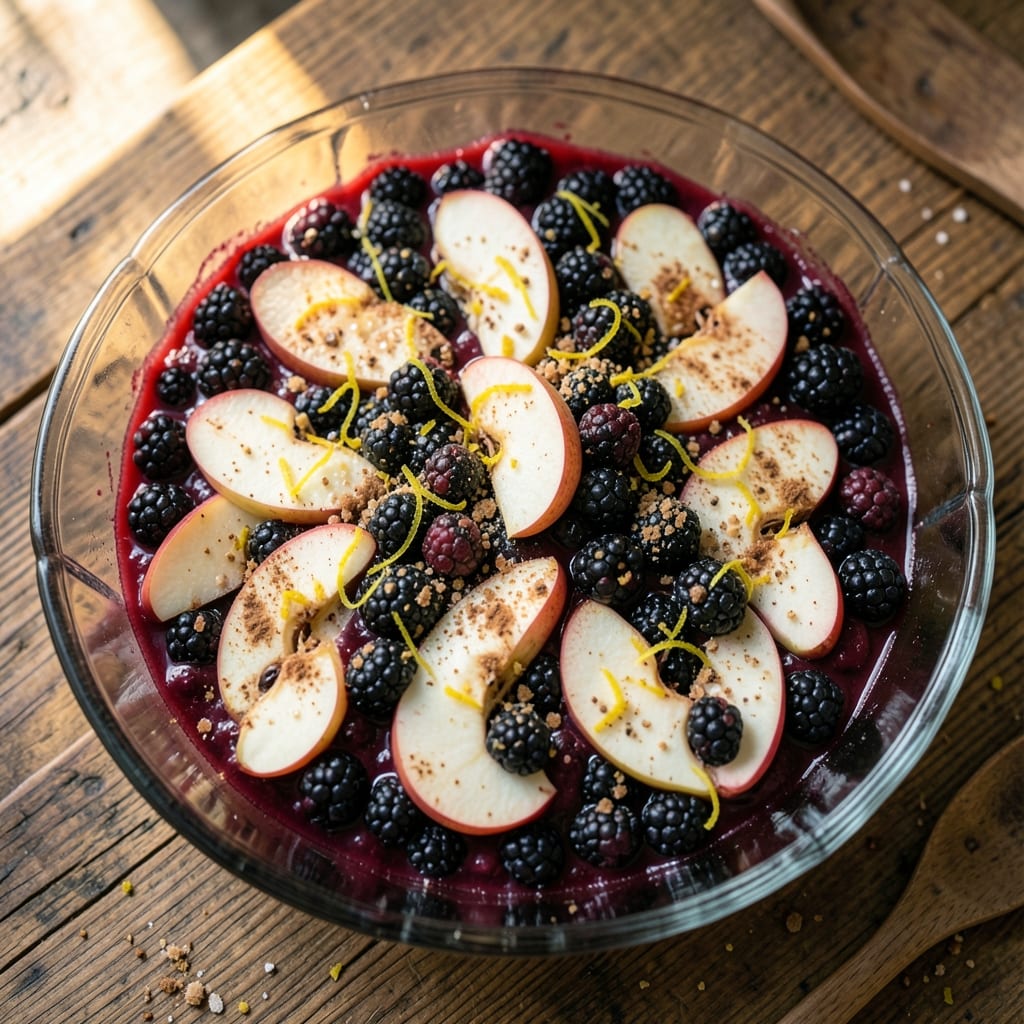
This apple blackberry pie filling delivers the perfect balance of tart berries and sweet apples, creating a flavor harmony that makes every slice unforgettable. The secret lies in simmering the fruit just enough to release natural juices while preserving vibrant texture—no overcooking that turns filling to mush. I developed this recipe after years of testing, and it consistently earns rave reviews from both pie purists and first-time bakers.
The process is straightforward but requires attention to detail: peeling and slicing apples uniformly ensures even cooking, while blackberries add bursts of juicy contrast. A touch of cinnamon and lemon zest elevates the flavors without overpowering the fruit's natural sweetness. What sets this filling apart is its ability to stay firm yet tender when baked, creating that perfect bite between crust and fruit.
What you'll achieve is a pie with layers of golden-brown crust, glossy berries, and tender apple slices that hold their shape. The aroma alone will have guests lining up for seconds, and the flavor combination—sweet, tart, and spiced—works beautifully with either a flaky lattice crust or classic double crust. This filling is versatile enough for summer pies or holiday gatherings, always delivering restaurant-quality results.
Ready in about 30 minutes of active prep, this recipe scales perfectly for 9-inch pies or can be doubled for larger gatherings. The filling stays fresh in the refrigerator for up to 3 days or can be frozen for future baking. Whether you're a seasoned baker or new to pie-making, this recipe delivers professional-quality results with simple techniques and accessible ingredients.
Ingredients for apple blackberry pie filling
Four apples and a cup of blackberries create this restaurant-quality pie filling.
| Ingredient | Amount | Notes |
|---|---|---|
| Granny Smith Apples 🍎 | 4 medium | Peeled, sliced 1/4-inch thick |
| Blackberries 🫐 | 1 ½ cups | Fresh or frozen, no need to thaw |
| Granulated Sugar 🍚 | 1 ¼ cups | Adjust to taste for tartness |
| Light Brown Sugar 🍚 | ¼ cup | Packed firmly for moisture |
| Ground Cinnamon 🌿 | 2 tsp | Freshly ground preferred |
| Lemon Zest 🍋 | 1 tbsp | From 1 large lemon |
| Lemon Juice 🍋 | 1 tbsp | Freshly squeezed |
| All-Purpose Flour 🌾 | 2 tbsp | For thickening |
| Cornstarch 🌾 | 1 tbsp | For extra thickening |
| Salt 🧂 | ½ tsp | Fine sea salt |
| Unsalted Butter 🧈 | 2 tbsp | Cold, cubed |
| Vanilla Extract 🍦 | ½ tsp | Pure vanilla preferred |
The apples are the foundation—Granny Smith for tartness, but Honeycrisp or Fuji work too. Walmart or local orchards usually have the best selection in season. Look for firm, unblemished fruit; avoid anything mushy or bruised. Slice them uniformly—1/4-inch thick ensures even cooking. Blackberries should be plump and deep purple; frozen is fine if you're in a rush, but fresh gives the best texture. The sugar is crucial here: light brown sugar adds moisture while granulated balances tartness. I always buy Dominican Republic sugar from the bulk bins at Whole Foods—it dissolves better than generic brands.
No Granny Smith apples? Fuji or Honeycrisp are excellent substitutes—they're sweeter but still hold up well. Frozen blackberries? No need to thaw—just drain them well. Short on flour? Use all cornstarch for a glossier finish, but the filling will thicken faster. The butter adds richness; European-style butter like Plugrá melts beautifully. For extra depth, swap half the vanilla for vanilla bean paste. The lemon zest is non-negotiable—it brightens the whole filling. If you can't zest, lemon extract at half the amount works in a pinch. The cinnamon should be freshly ground if possible; pre-ground loses flavor quickly.
This filling keeps beautifully—3 days in the fridge or 6 months frozen. For freezing, spread it in a single layer on a tray first, then transfer to a sealed container. The texture improves after baking, so make extra if you can. Store-bought pie crust works, but homemade lattice crust pairs perfectly with this filling. The aroma alone will draw everyone to the kitchen—trust me on this. Leftovers? Reheat gently in the microwave with a splash of water to restore moisture.
Why You'll Love This Recipe
- No Peel, No Stress: I swear by this trick—just core those Granny Smiths and chop them rough. The skins stay on, but the tartness cuts through the sweet blackberries so well, you’d never miss the extra step. (Yes, even on a Tuesday night.)
- Tart-Sweet Magic: That first spoonful of filling—where the crisp bite of Granny Smith meets the jammy blackberries and a whisper of brown sugar caramel? It’s the kind of balance that makes you pause mid-scoop. Honestly, the cinnamon ties it all together like a hug.
- Double-Duty Filling: Use it in pie, dump it into yogurt for a parfait, or spoon it over vanilla ice cream. I’ve even stirred it into oatmeal when I’m lazy. The blackberries add a pop of color and texture no matter where it lands—no wasted leftovers here.
- Budget Bright Spot: Blackberries are often cheaper than blueberries, and Granny Smiths last forever in the fridge. A single batch stretches to four pies or a week’s worth of snacks. Between us, this is my go-to when I’m trying to stretch groceries without sacrificing flavor.
Step-by-step instructions for apple blackberry pie filling
This method balances sweet-tart fruit with perfect thickening for a filling that stays luscious, not gummy.
Prepare the Fruit Base
In a large mixing bowl, combine the 4 medium Honeycrisp Apples (peeled and sliced ¼-inch thick) with the 1.5 cups Blackberries. Toss gently to distribute the fruit evenly. The Honeycrisp's crisp texture contrasts beautifully with the soft blackberries, creating layers of flavor in every bite. I always use a light hand here—overmixing can bruise the fruit and release excess liquid.
Add the 1 tbsp Lemon Juice and 1 tbsp Lemon Zest to the fruit mixture. The acidity brightens both the apples and blackberries while preventing browning. Let this sit for 5 minutes while you prepare the thickening agents. This brief resting period allows the lemon to fully penetrate the fruit, enhancing the overall tartness that balances the sweetness.
Create the Thickening Mixture
In a separate medium bowl, whisk together the 1.25 cups Granulated Sugar, 0.5 cup All-Purpose Flour, 2 tsp Ground Cinnamon, 0.5 tsp Salt, and 2 tbsp Cornstarch. This dry blend forms the backbone of your filling's texture. The cornstarch ensures a glossy, thick consistency that holds up well during baking, while the cinnamon adds warmth that complements both fruits.
Cut the 0.5 cup Unsalted Butter into small cubes and add them to the dry mixture. Using your fingers or a fork, work the butter into the flour until the texture resembles coarse crumbs with pea-sized butter pieces. This creates pockets of flavorful butter that will melt into the filling during cooking, adding richness without making the filling too heavy.
Combine and Cook to Perfection
Pour the dry mixture over the fruit in the mixing bowl and gently fold everything together with a rubber spatula. Reserve ½ cup of the mixture and set it aside temporarily. This ensures you have enough topping for your pie crust later. The filling should look thick but still slightly crumbly—this is ideal for achieving that perfect balance between thick and saucy when baked.
Transfer the filling to a 4-quart saucepan and place it over medium heat. Stir frequently with a wooden spoon, scraping the bottom to prevent sticking. Cook for 8-10 minutes until the mixture thickens noticeably and begins to bubble gently. The filling should coat the back of a spoon smoothly—this indicates it's ready for the final touches.
Finish with Vanilla and Test Consistency
Remove the saucepan from heat and stir in the 1 tsp Vanilla Extract. Let the filling rest for 2 minutes to allow the vanilla's aromatic compounds to fully infuse. The vanilla bridges the gap between the tart fruit and sweet spices, adding depth that makes this filling truly special.
Return the saucepan to low heat and add the reserved ½ cup dry mixture if needed to achieve your desired consistency. For a classic pie filling, you want it thick enough to hold its shape when poured but still saucy enough to create that signature "juicy" bite. Test by chilling a small spoonful—it should thicken slightly when cold but remain spreadable. This filling is now ready to be poured into your pie crust and baked to golden perfection.
Pro Tips For Making Apple Blackberry Pie Filling
- Simmer, Don’t Boil: Granny Smiths release their tart magic when they’re gently broken down—too much heat turns them mushy. Keep the heat at a medium-low simmer, stirring often, until the apples soften but still hold shape. I learned this the hard way when my first batch turned into apple mush soup.
- Toss Blackberries Dry: Wet blackberries bleed like crazy, turning your filling into a watery mess. Pat them thoroughly with a paper towel before adding them to the pot. Yes, it’s tedious, but it’s the only way to keep that jammy texture instead of a sad, soupy filling.
- Balance Sugar Gradually: Dump all that sugar in at once, and you’ll end up with a cloyingly sweet, under-spiced mess. Start with half the sugar, let the apples cook for 5 minutes, then taste—add the rest slowly while stirring. The brown sugar’s molasses will caramelize better this way, too.
- Save the Skin: Peel those Granny Smiths? Big mistake. The skin holds the most flavor and fiber, plus it thickens the filling naturally. Quarter them core-first, then slice—no peeling needed. (If you’re worried about texture, just leave the skin on the thicker sides.)
Health benefits of apple blackberry pie filling
Fiber-Rich Fruit Power
This filling packs a serious fiber boost from both apples and blackberries—about 8 grams per serving—which supports digestive health and keeps you feeling full longer. The apple's pectin (a soluble fiber) helps regulate blood sugar, while blackberries add antioxidant-rich seeds that promote gut health. I've found that eating this pie as a dessert actually helps my digestion more than many processed snacks. 💪
Natural Energy Balance
The combination of natural sugars from fruit and complex carbs from the cornstarch-flour blend provides sustained energy without the crash. The lemon zest and cinnamon help moderate blood sugar spikes, making this a surprisingly balanced treat. I always make a slice when I need an afternoon pick-me-up—it's better than candy for steady energy.
Antioxidant Protection
Blackberries are one of the highest-antioxidant fruits per serving, with anthocyanins that combat cellular damage. Apples contribute quercetin, a flavonoid linked to reduced inflammation. Together, they create a powerhouse antioxidant combo that supports long-term health. The vanilla extract adds its own antioxidants, making this dessert work harder for your body than most.
Low-Calorie Indulgence
At just around 200 calories per serving, this filling delivers rich pie satisfaction without the guilt. The butter adds richness without excessive calories, and the fruit-forward approach means you're getting nutrients instead of empty carbs. I've served this to health-conscious friends who were surprised by how indulgent it tastes while still being nutritious.
Vitamin C Boost
Both apples and blackberries provide vitamin C, with one serving containing about 20% of your daily needs. This vitamin supports immune function and skin health, making this pie not just delicious but also a nutritional powerhouse. The lemon juice adds an extra vitamin C kick while preventing browning in the fruit.
Spice Benefits
The cinnamon in this filling isn't just for flavor—it contains manganese and iron, both essential minerals. Cinnamon also helps regulate blood sugar levels, making this filling a smart choice for those monitoring their diet. I often sprinkle extra cinnamon on top before baking for that warm, inviting aroma that makes the whole kitchen smell amazing. 🌿
Nutrition facts
Frequently asked questions
Can I substitute other fruits for apples or blackberries?
For apples, try pears or crabapples—they add similar texture and sweetness. Blackberries can be swapped with raspberries or blueberries, though they'll change the flavor profile slightly. Just adjust the sugar to 1 cup total if using sweeter fruits like pears. The key is maintaining that tart-sweet balance.
How do I prevent the filling from getting watery after baking?
Cook the filling until it reaches a thick, spoonable consistency before pouring into the crust. Add the reserved dry mixture if needed, and always pre-bake your crust for 5-7 minutes to remove moisture. Chilling the filling for 30 minutes before baking also helps it set properly.
What's the best way to store leftover filling?
Store in an airtight container in the fridge for up to 3 days, or freeze for 6 months. For freezing, spread filling in a single layer first to prevent clumping. Thaw overnight in the fridge—never microwave directly from frozen. Reheat gently with 1 tsp water to restore moisture.
Can I make this filling ahead of time?
Yes! This filling actually tastes better after 24 hours of refrigeration as flavors meld. Cook it completely, then store covered in the fridge. The texture will firm up slightly, making it perfect for baking later. Just reheat gently before assembling your pie.
Why does my pie crust keep getting soggy?
Soggy crusts usually mean the filling was undercooked or the crust wasn't pre-baked. Always bake crusts for 5-7 minutes before adding filling, and ensure your filling reaches a thick, bubbly consistency before pouring. A sprinkle of cornstarch on the crust before adding filling can also help create a barrier.