
Desserts
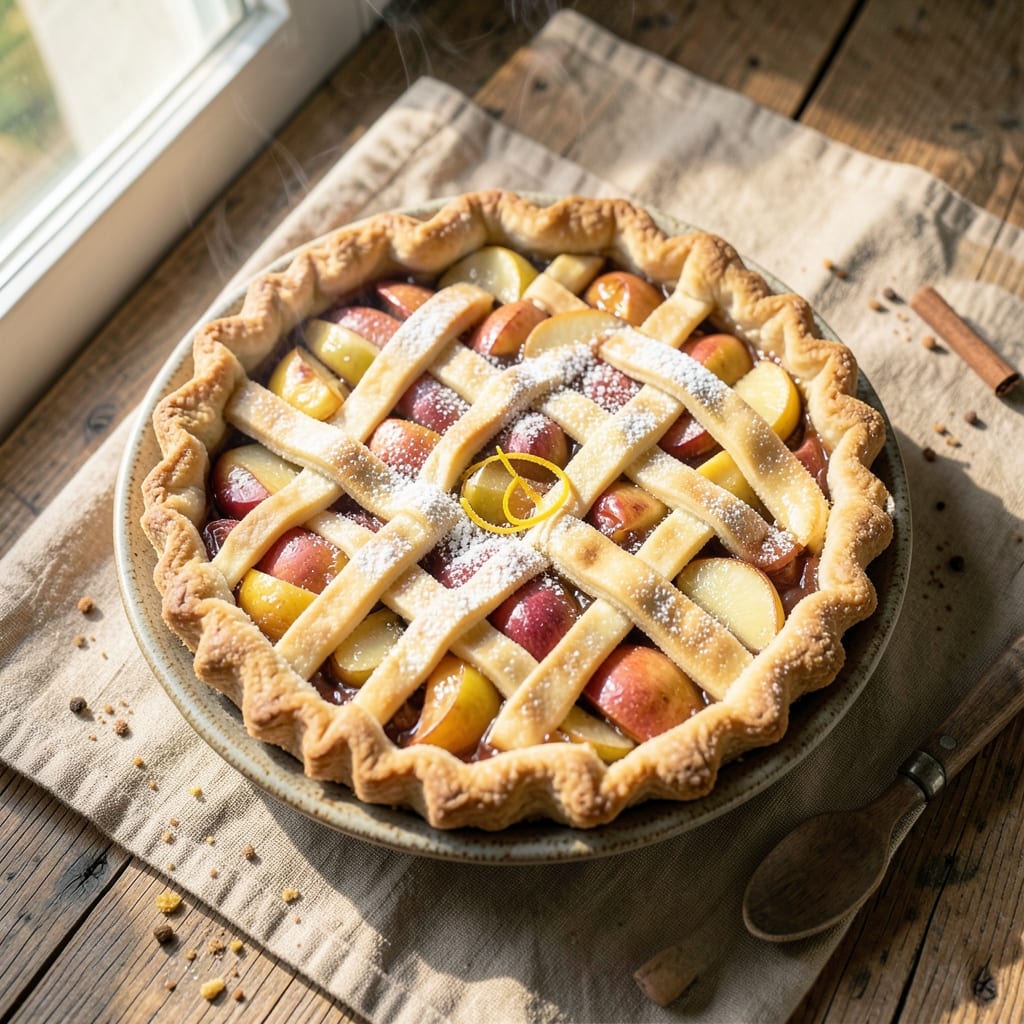
This all-natural apple pie recipe delivers the perfect balance of crispy lattice crust and spiced apple filling—no artificial ingredients in sight. The secret lies in a simple, all-butter crust that bakes up golden and flaky, while the filling caramelizes into tender, spiced perfection. I’ve perfected this recipe over years of baking, ensuring every slice tastes like autumn in a pie dish.
The crust starts with just flour, butter, water, and salt—no shortcuts, no preservatives—while the filling combines seasonal apples, natural sugars, and warm spices like cinnamon and nutmeg. A lattice top adds visual appeal and that coveted crispy texture, making it both beautiful and satisfying. The result? A pie that’s crisp on the outside, tender on the inside, and packed with the comforting flavors of home.
Baking at 375°F for 50 minutes ensures the crust stays golden and the filling thickens just enough to hold its shape when sliced. The lattice pattern isn’t just decorative—it creates pockets of crispy edges while keeping the filling soft and juicy. Serve warm with a scoop of vanilla ice cream or a dollop of whipped cream for the ultimate dessert experience.
This recipe also offers flexibility—swap the butter for vegan butter or use a gluten-free flour blend for the crust without sacrificing texture. The filling can be prepped ahead, making it perfect for holiday gatherings or cozy weeknight treats. Every bite is a testament to natural ingredients done right.
Ingredients for all natural apple pie
Golden crust meets spiced apples—just 12 ingredients for autumn perfection.
| Ingredient | Amount | Notes |
|---|---|---|
| All-Purpose Flour 🌾 | 3 cups | Unbleached preferred for golden crust |
| Unsalted Butter 🧈 | 1 cup | Cold, cubed for flaky layers |
| Granulated Sugar 🍚 | ¼ cup | For crust and filling |
| Ice Water 💧 | ½ cup | Chilled for easy handling |
| Salt 🧂 | ½ tsp | Fine sea salt preferred |
| Mixed Apples 🍎 | 6 medium | Honeycrisp, Granny Smith, or Gala |
| Brown Sugar 🍚 | ¾ cup | Packed for filling sweetness |
| Ground Cinnamon 🌿 | 2 tsp | Freshly ground for warmth |
| Ground Nutmeg 🌿 | ¼ tsp | Freshly grated preferred |
| Lemon Juice 🍋 | 1 tbsp | Freshly squeezed for brightness |
| Vanilla Extract 🌸 | 1 tsp | Pure vanilla for authentic flavor |
| All-Purpose Flour 🌾 | ½ cup | For lattice topping |
The apples make or break this pie. Honeycrisp and Granny Smith give the perfect balance of sweet and tart—Costco or local orchards usually have great selections. If you can only find one type, pair it with a splash of extra lemon juice. For the crust, Plugrá butter is my go-to, but any good-quality unsalted butter works. The key is keeping it cold—cut it into small cubes and toss them with the flour before mixing. This ensures those perfect flaky layers. And don't skip the ice water—it keeps the dough from getting too warm while you work.
No mixed apples? Any firm apple works—just adjust the sugar to taste. The filling can be prepped ahead and stored for 2 days in the fridge, which is a lifesaver for pie day. Short on vanilla? Vanilla bean paste or even a scraped vanilla pod adds depth. The lattice topping isn't just for looks—it creates those crispy edges while keeping the filling soft. If cutting strips feels overwhelming, use a pizza cutter or sharp knife. And trust me, the extra 10 minutes of weaving is worth the showstopping result. The spices? Freshly ground cinnamon and nutmeg make all the difference—don't use the dusty stuff from the back of your spice rack.
This pie tastes even better the next day, so bake it ahead if you can. Store it at room temperature for 2 days or freeze the whole pie for 3 months. I like to reheat slices in a 350°F oven for 5-10 minutes to crisp up the crust. The filling keeps well too—you can actually make it a day ahead and refrigerate it before baking. And if you're feeling fancy, brush the lattice with a little egg wash before baking for extra shine. Just don't tell anyone about the shortcut: if you're in a rush, store-bought pie crust works in a pinch—just skip the lattice and go for a classic top crust.
Why You'll Love This Recipe
- No-Fuss Dough: I’ll be real—this pie crust only needs four ingredients and takes five minutes to mix. Just cold butter, flour, ice water, and a pinch of salt. No food processor, no chilling stress. My hands get a little cold, but the flaky layers are worth it.
- Caramelized Magic: That sugar in the filling? It doesn’t just sweeten—it turns golden and sticky as the apples cook down. The butter melts into the crust edges, creating this buttery, crispy rim that’s dangerously addictive. Honestly, I’ve been known to eat slices straight from the pan.
- Weeknight or Holiday: Between us, this pie works everywhere. Need a quick dessert after dinner? Done. Hosting Thanksgiving but short on time? Still done. Even my picky teenage nephew asks for seconds. The beauty? It’s just apples, sugar, and a little love—no fancy toppings required.
- Budget-Friendly Leftovers: One pie feeds six, but it’ll feed more if you slice it thin. The crust stays crisp even reheated, and the filling? It’s basically edible candy. I’ve packed slices for lunch, frozen portions for lazy Sundays, and still had enough for dessert. Zero waste, all flavor.
Step-by-step instructions for all-natural apple pie
Here's how to craft a golden, flaky lattice-topped pie with perfect spice balance.
Make the Crust with Cold Butter
Cut the 1 cup unsalted butter into ½-inch cubes and place in the freezer for 10 minutes to keep it cold. In a large bowl, whisk together the 3 cups all-purpose flour and ½ teaspoon salt. Add the chilled butter cubes and use a pastry cutter or your fingers to work the butter into the flour until you have pea-sized crumbs with some flour remaining.
Add the ¼ cup granulated sugar and mix lightly. Sprinkle over the ½ cup ice water and gently toss with a fork until the dough just comes together. Be careful not to overmix—just combine until it holds when pressed. Divide the dough into two equal discs, wrap in plastic, and chill for at least 1 hour (or up to 2 days). This resting time is crucial for developing flavor and preventing shrinking during baking.
Prepare the Spiced Apple Filling
Peel, core, and slice the 6 medium mixed apples into ¼-inch thick slices. Toss them immediately with 1 tablespoon lemon juice to prevent browning. In a large bowl, combine the apple slices with ¾ cup packed brown sugar, 2 teaspoons ground cinnamon, ¼ teaspoon ground nutmeg, and 1 teaspoon vanilla extract. Mix gently but thoroughly to coat the apples evenly.
Transfer the filling to a 9-inch pie dish and arrange the apple slices in a single layer, slightly overlapping. Press down gently to create a compact filling—this ensures even baking and prevents a soggy bottom. The apples should fit snugly in the dish, with no more than ½ inch of space between slices.
Roll and Assemble the Crust
On a lightly floured surface, roll out one of the chilled dough discs into a 12-inch circle—about ⅛-inch thick. Drape the dough over the pie dish and trim any excess hanging over the edges. Gently press the dough into the pie dish, creating a ¼-inch overhang all around. Repeat with the second dough disc, rolling it out to the same size.
For the lattice top, cut the second dough disc into ½-inch wide strips using a sharp knife or pizza cutter. Lay 4 strips horizontally across the pie, spaced ¼ inch apart. Fold back every other strip, then lay a perpendicular strip across the folded sections. Unfold the folded strips and press gently to seal. Continue until the entire pie is covered with a crisscross pattern. Trim any excess dough hanging over the edges.
Bake to Golden Perfection
Preheat your oven to 375°F. Place a baking sheet on the lower rack and pour ½ cup ice water into it. This creates steam during baking, which helps the crust brown evenly and prevents a soggy bottom. Bake the pie on the middle rack for 45-55 minutes, until the crust is deep golden brown and the filling is bubbling gently.
Here's the thing—your oven might run hot, so start checking at the 40-minute mark. The lattice should be crisp and the apples tender enough to pierce easily with a paring knife. If the edges brown too quickly, cover them loosely with aluminum foil after 25 minutes of baking. Let the pie cool for at least 2 hours before slicing—this allows the filling to set and the juices to distribute.
Pro Tips For Making All Natural Apple Pie
- Chill the Butter First: Cold butter makes flaky crusts—no excuses. Cut that unsalted butter into cubes and pop it in the freezer for 15 minutes before mixing with flour. I learned this the hard way after making pie dough that turned out more cakey than crisp.
- Pre-Cook the Apples: Skip the soggy bottom. Toss your sliced apples with sugar and a pinch of salt, then let them sit for 15 minutes before filling the pie. This draws out moisture, so they release juices evenly and don’t turn to applesauce halfway through baking.
- Vent the Top Crust: No one wants a pie that looks like a drum. Cut a few slits in the top crust before baking—about ½-inch long—to let steam escape. This keeps the crust from puffing up like a balloon and collapsing into a sad, greasy mess.
- Use a Mixer for Dough: Pulse, don’t stir. Use a food processor to mix flour, butter, and ice water in short bursts—just until the dough comes together. Overmixing develops gluten, and suddenly your flaky crust turns into a chewy biscuit. Stop when it looks like wet sand, not playdough.
Make-ahead tips for this dish
Filling Prep Ahead
The apple filling is the star of this pie, and it actually tastes better when prepped in advance. I like to make mine the night before—I toss the sliced apples with sugar, spices, and lemon juice, then refrigerate in an airtight container. This lets the flavors meld beautifully while preventing browning. When you're ready to bake, simply transfer the chilled filling directly to your pie dish. Pro tip: If the filling looks too wet after chilling, let it sit at room temperature for 10-15 minutes before assembling—this helps it thicken slightly for better texture. 🍎
Crust Make-Ahead
Never stress about last-minute crust prep again. You can make the pie dough up to 2 days in advance and store it wrapped tightly in plastic in the fridge. The longer it rests, the more flavor develops and the flakier it becomes. When you're ready to bake, let the dough sit at room temperature for 30 minutes before rolling—this makes it much easier to handle. I often prep both dough discs the day before, then roll and assemble right before baking. This is especially helpful if you're hosting a gathering and want to focus on other details. 🧈
Full Pie Assembly
For maximum convenience, you can assemble the entire pie (including the lattice) the night before baking. Wrap the assembled pie tightly in plastic wrap and refrigerate. When you're ready to bake, let it sit at room temperature for 1 hour before putting it in the oven. This prevents temperature shock and helps the crust bake evenly. Just be sure to preheat your oven thoroughly—375°F is perfect—and add that ice water to the baking sheet for that steam boost. The pie will still turn out golden and flaky, just like fresh. 💫
Freezing Options
This pie freezes beautifully for up to 3 months, making it perfect for holiday prep. Assemble the pie completely, then wrap it tightly in plastic wrap followed by aluminum foil. Label with the date and freeze. When ready to bake, thaw overnight in the fridge, then bake as directed—just add 5-10 minutes to the baking time since it starts cold. You can also freeze just the filling separately if you prefer to bake the crust fresh. The texture holds up surprisingly well after freezing, though the crust might need a few extra minutes to crisp up. ❄️
Filling Storage
If you're short on time, store the prepared filling in the fridge for up to 2 days before baking. The apples will soften slightly, which actually enhances the pie's texture. When ready to bake, let the filling sit at room temperature for 20 minutes before assembling—this helps it firm up just enough. For longer storage, you can freeze the filling separately for up to 2 months. Just thaw it in the fridge overnight before using. The spices keep their warmth, and the apples maintain their sweetness perfectly. 🌟
Nutrition facts
Frequently asked questions
Can I use just one type of apple instead of mixed varieties?
While mixed apples give the best balance of sweet and tart flavors, you can use just one variety. Granny Smith adds tangy brightness, Honeycrisp brings natural sweetness, or Braeburn offers a perfect middle ground. Just adjust the sugar slightly—½ cup instead of ¾ cup if using extra-sweet apples like Gala. The key is firm, crisp apples that hold their shape during baking.
How do I prevent a soggy bottom in my all-natural apple pie?
Soggy bottoms happen when moisture escapes the filling too quickly. First, preheat your oven thoroughly to 375°F and place a baking sheet with ½ cup ice water on the lower rack to create steam. Also, pre-cook your apples for 5-10 minutes in a saucepan with 1 tablespoon lemon juice and 1 tablespoon sugar before assembling—this removes excess liquid. Finally, chill the filling for 1 hour before baking to help it firm up.
What's the secret to making the lattice crust look perfect?
The lattice should have ½-inch wide strips with ¼-inch gaps between them. Start by cutting strips from the second dough disc, then lay 4 horizontal strips across the pie, spacing them evenly. Fold back every other strip, add a perpendicular strip, then unfold and press gently. Use a pizza cutter or sharp knife for clean edges. For extra shine, brush the lattice with a beaten egg wash before baking.
Can I make this pie gluten-free or vegan?
Yes! For a gluten-free crust, use a 1:1 gluten-free flour blend (like Bob's Red Mill) and add ½ teaspoon xanthan gum to the dough. For vegan butter, substitute Earth Balance or another plant-based butter in equal amounts. The filling remains the same, but reduce the sugar to ½ cup since vegan butter has less fat. Both versions require slightly longer chilling times—2 hours for the dough.
Why does my pie crust turn out pale instead of golden brown?
Pale crusts usually mean one of three things: the butter wasn't cold enough, the oven wasn't hot enough, or the crust lacked proper ventilation. First, ensure your butter is freezer-cold when mixing. Preheat your oven to 375°F and place the pie on the middle rack. For extra color, brush the crust with a little milk or egg wash before baking. If the edges brown too quickly, cover them with foil after 25 minutes.